
As organizations of all cuts and sizes are migrating to the cloud, there is a need to risk-assess the outcomes of this process. One of the many risks involved is when they end up throwing all the eggs in one basket and move most of their business operations under a single vendor, creating a vendor lock-in effect.
In order to avoid that, some companies have adopted a loosely coupled system with either mixed or hybrid cloud topologies; a multi-cloud approach where operations are spread across two or more cloud providers.
With that approach, another risk factor comes into question: In a multi-cloud environment, how do we manage credentials such as SSH keys, user credentials and API tokens, in a way that avoids vendor lock-in? The answer: By using a dedicated secret management solution, of course, that has no ties or biases against a particular cloud provider. By having a more customized and platform-agnostic option for handling sensitive data, we can perform tasks like secrets rotation or fine-grained access control and sharing.
This post provides a look at Cyberark Conjur, which is perfectly designed for handling secrets in multi- or hybrid-cloud deployments. In a step-by-step guide that includes how to install a Conjur appliance in a Virtual Machine, we demonstrate how to load policies that control credentials across cloud Accounts (AWS and Azure, specifically), and how to test the retrieval of those credentials in a unified and secure way.
Let’s get started!
Step 1 – Install Conjur
The first thing we need to do is deploy a Conjur Server in a VM that is located within your infrastructure. We secure the endpoint with a self-signed certificate for encrypting the connection traffic. For reference, we show how that’s done using an Azure VM from the UI Portal.
Go to https://portal.azure.com/#home and select the Virtual Machines Icon from the list:
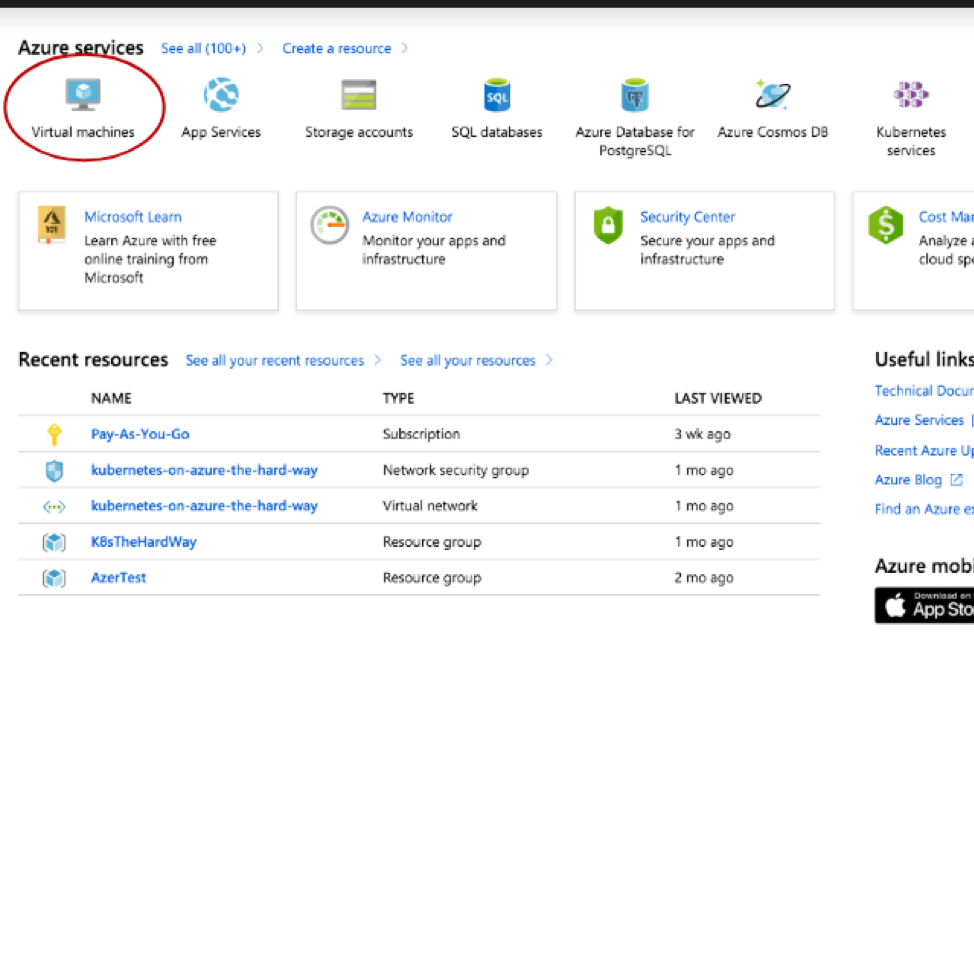 Fig 1. Creating a new Virtual Machine
Click on the +Add button in the next screen:
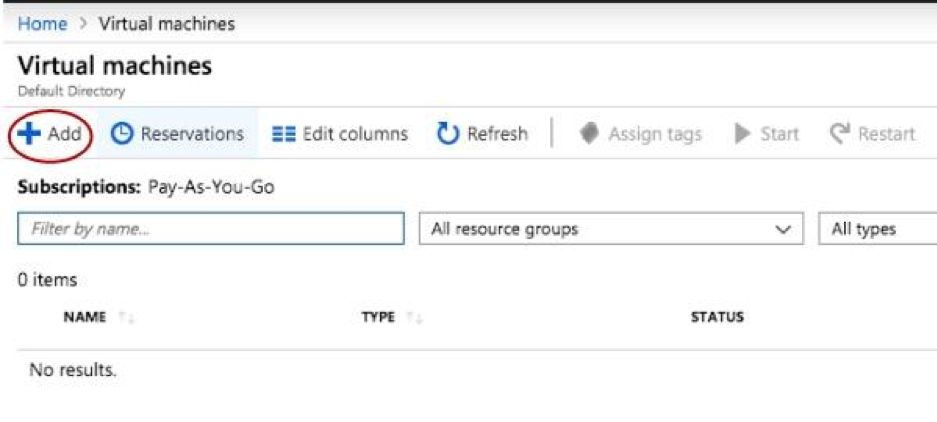 Fig 2. Add button
You will be presented with a new VM form. Make sure you fill in the necessary information, and open ports 80, 443 and 22 on the machine:
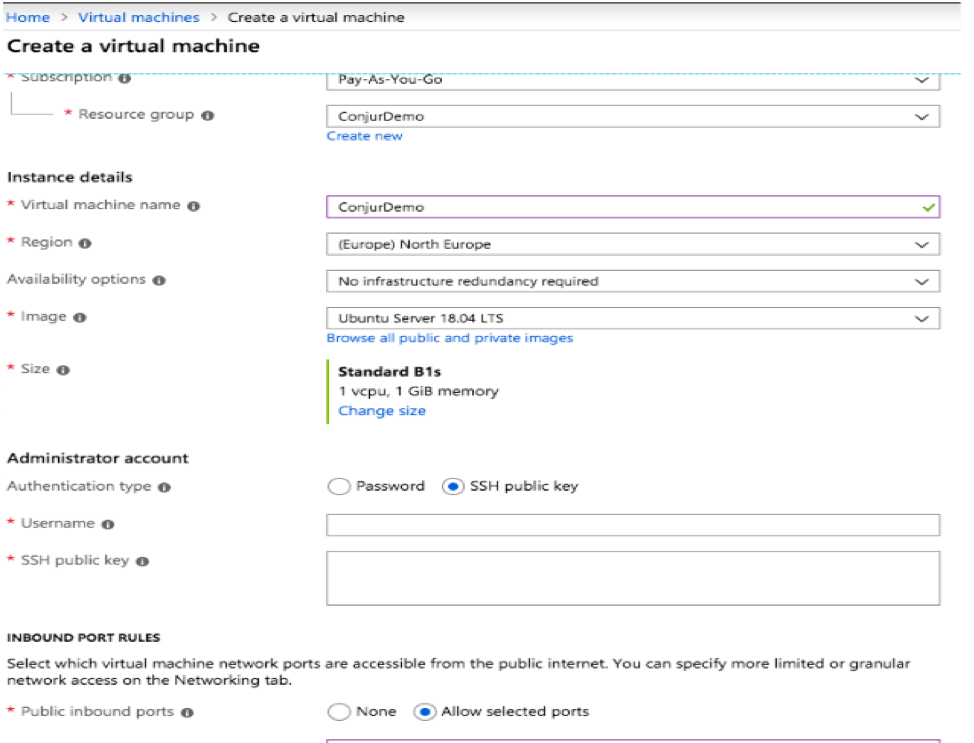
Fig 3. New VM form
Continue through all the steps on the form and click on Review & Create. It will perform a validation step to make sure you did not miss anything. After that, click on Create and wait until the machine is provisioned:
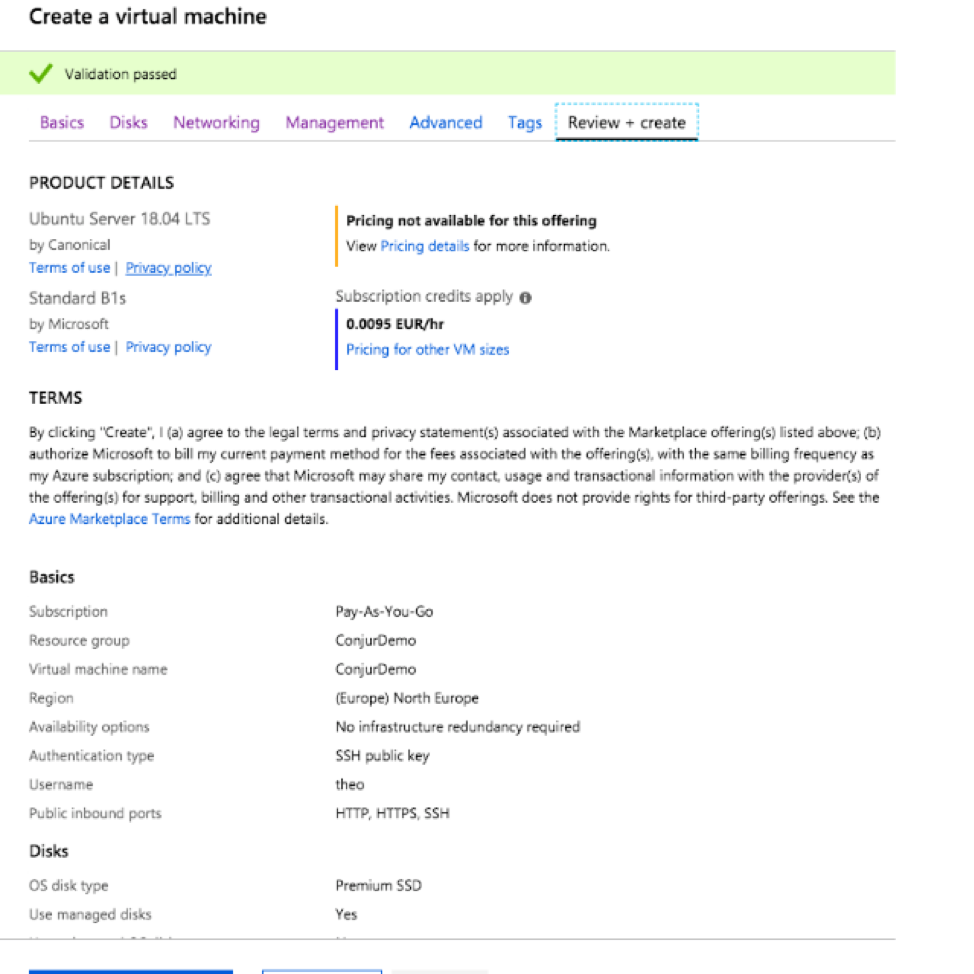
Fig 4. New VM form review
Once it completes, the screen will give you a link to go to that resource. Click on the button and then find the DNS name configuration to give the server a good alias:
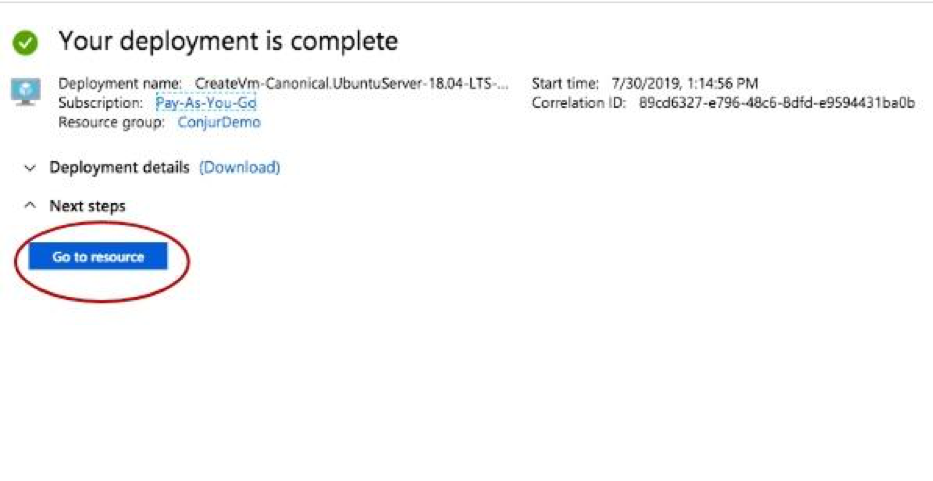
Fig 5. Deployment complete
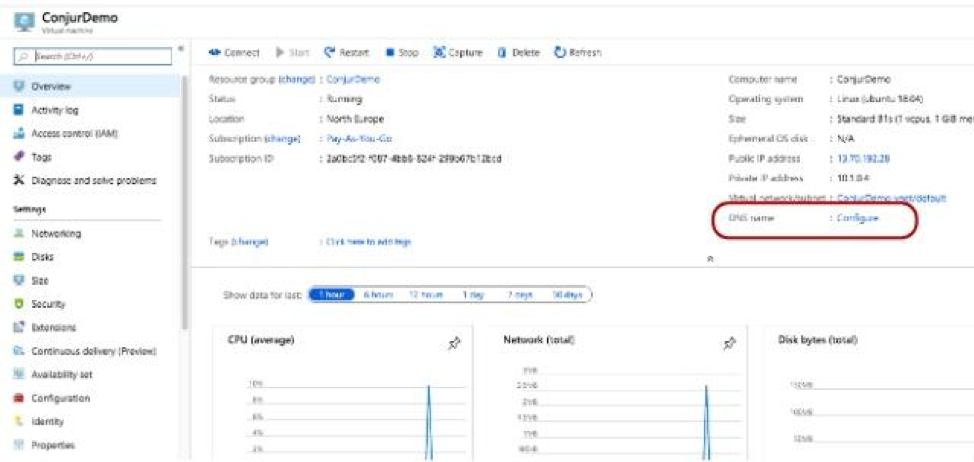
Fig 6. DNS config
You need to give it a good name in order to specify it on the self-signed certificate that you create on the server. For the purpose of this demonstration, we use conjur.northeurope.cloudapp.azure.com. Click Save.
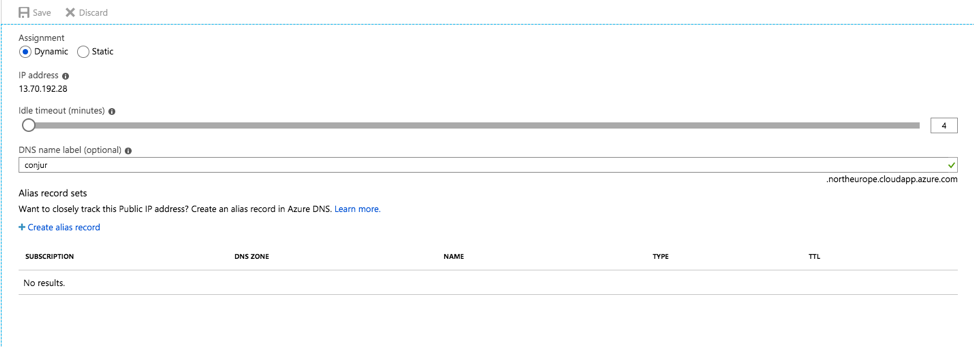
Fig 7. DNS name
Go to the Overview Screen and click on the Connect button to show the panel:
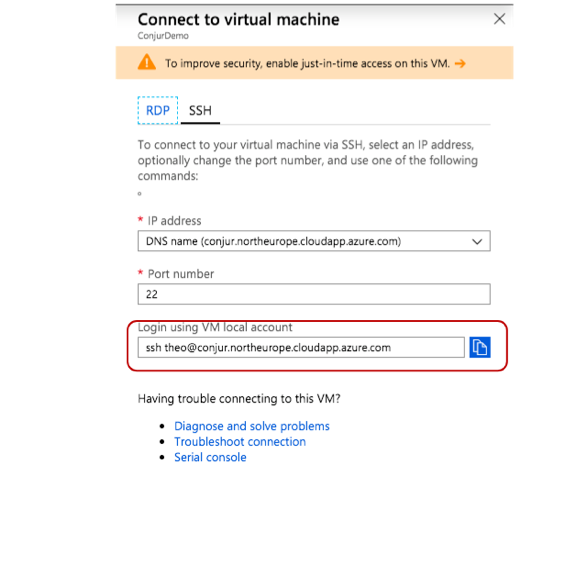 Fig 8. Connection panel
From the connection panel information, copy the SSH connection string and execute it in your console:
$ ssh [email protected]
The authenticity of host 'conjur.northeurope.cloudapp.azure.com (13.70.192.28)' can't be established.
ECDSA key fingerprint is SHA256:RlQwpLy5VPaCrG7LmkpYWi8p4gkcFzEpWAF7AnJgaT0.
Are you sure you want to continue connecting (yes/no)? yes
Warning: Permanently added 'conjur.northeurope.cloudapp.azure.com,13.70.192.28' (ECDSA) to the list of known hosts.
Welcome to Ubuntu 18.04.2 LTS (GNU/Linux 4.18.0-1024-azure x86_64)
Now we install Docker and Docker-Compose so we can provision all the required software easily.
Install Docker
$ sudo apt update
$ sudo apt install apt-transport-https ca-certificates curl software-properties-common
$ curl -fsSL https://download.docker.com/linux/ubuntu/gpg | sudo apt-key add -
$ sudo add-apt-repository "deb [arch=amd64] https://download.docker.com/linux/ubuntu bionic stable"
$ sudo apt update
$ sudo apt install docker-ce
$ sudo systemctl status docker
$ sudo usermod -aG docker ${USER}
Logout and login again to the shell.
Install Docker-compose
$ sudo curl -L "https://github.com/docker/compose/releases/download/1.23.1/docker-compose-$(uname -s)-$(uname -m)" -o /usr/local/bin/docker-compose
$ sudo chmod +x /usr/local/bin/docker-compose
$ docker-compose --version
Install Conjur
Create a folder for the deployment files:
$ mkdir conjur && cd conjur
Create a default.conf file for the nginx configuration:
cat << ENDL > default.conf
server {
  listen 80;
  return 301 https://conjur$request_uri;
}
server {
  listen 443;
  server_name localhost conjur.northeurope.cloudapp.azure.com;
  ssl_certificate /etc/nginx/nginx.crt;
  ssl_certificate_key /etc/nginx/nginx.key;

  ssl on;
  ssl_session_cache builtin:1000 shared:SSL:10m;
  ssl_protocols TLSv1 TLSv1.1 TLSv1.2;
  ssl_ciphers HIGH:!aNULL:!eNULL:!EXPORT:!CAMELLIA:!DES:!MD5:!PSK:!RC4;
  ssl_prefer_server_ciphers on;

  access_log /var/log/nginx/access.log;

  location / {
    proxy_pass http://conjur:3000;
  }

  error_page 500 502 503 504 /50x.html;
  location = /50x.html {
    root /usr/share/nginx/html;
  }
}

ENDL
Here we made sure to specify the FQDN for our server, as emphasized in bold.
Next, we create the self-signed certificates for the Nginx Proxy. Make sure you specify the full FQDN of your server on the Common Name entry:
$ openssl req -x509 -sha256 -newkey rsa:2048 -keyout cert.key -out cert.crt -days 1024 -nodes
Generating a RSA private key
.....................................+++++
...............+++++
writing new private key to 'cert.key'
-----
You are about to be asked to enter information that will be incorporated
into your certificate request.
What you are about to enter is what is called a Distinguished Name or a DN.
There are quite a few fields but you can leave some blank
For some fields there will be a default value,
If you enter '.', the field will be left blank.
-----
Country Name (2 letter code) [AU]:IR
State or Province Name (full name) [Some-State]:Limerick
Locality Name (eg, city) []:Limerick
Organization Name (eg, company) [Internet Widgits Pty Ltd]:Teckro
Organizational Unit Name (eg, section) []:
Common Name (e.g. server FQDN or YOUR name) []:conjur.northeurope.cloudapp.azure.com
Email Address []:
After that step, create the docker-compose.yml file that will describe the Conjur Server:
$ cat << ENDL > docker-compose.yml
version: '2'
services:
  postgres:
    image: postgres:9.3

  conjur:
    image: cyberark/conjur:latest
    command: server -a cucumber
    environment:
      PORT: 3000
      DATABASE_URL: postgres://postgres@postgres/postgres
      CONJUR_DATA_KEY: "W0BuL8iTr/7QvtjIluJbrb5LDAnmXzmcpxkqihO3dXA="
    ports:
      - "3000:3000"
    depends_on: [ postgres ]

  proxy:
    image: nginx:1.13.6-alpine
    container_name: nginx_proxy
    ports:
      - "80:80"
      - "443:443"
    volumes:
      - ./default.conf:/etc/nginx/conf.d/default.conf:ro
      - ./cert.key:/etc/nginx/nginx.key:ro
      - ./cert.crt:/etc/nginx/nginx.crt:ro
    depends_on: [ conjur ]

  client:
    image: cyberark/conjur-cli:5
    entrypoint: sleep
    command: infinity
    environment:
      CONJUR_APPLIANCE_URL: https://proxy
      CONJUR_ACCOUNT: cucumber
      CONJUR_AUTHN_LOGIN: admin

ENDL
The Nginx Proxy listens to both ports 80 and 443, and it will proxy all the requests to https://conjur:3000
Next, run docker-compose up and observe the logs in the console. Look for a string named:
API key for admin:
and save it somewhere safe. This is the admin account key to interact with the REST API:
$ docker-compose up
It may take a while once the ports are propagated, but after a few minutes you should be able to visit the hostname and see the Conjur Welcome Page.
Now that we have the Conjur Server started, let’s try to install the Conjur-CLI tool to interact with the server from within the local machine.
First, on your local machine, install Conjur-CLI:
$ gem install conjur-cli
Run the init option to configure some defaults:
$ conjur init
Enter the URL of your Conjur service: https://conjur.northeurope.cloudapp.azure.com

SHA1 Fingerprint=40:41:5C:45:43:5B:E1:CF:9B:57:10:89:F4:CE:60:A1:2F:BE:FA:7E

Please verify this certificate on the appliance using command:
openssl x509 -fingerprint -noout -in ~conjur/etc/ssl/conjur.pem

Trust this certificate (yes/no): yes
Enter your organization account name: cucumber
Wrote certificate to /Users/itspare/conjur-cucumber.pem
Wrote configuration to /Users/itspare/.conjurr
The server is ready. With the last successful command, we can now focus on writing our infrastructure policies for multi-cloud deployments.
Step 2 – Design and Load Policies
Now that we have set up the server, let’s see what strategies we can use to handle secrets in a multi-cloud environment. Generally, when we work with multiple-cloud or hybrid-cloud providers, we need a plan for our configuration and for our credentials, in a way that it can be interchanged and not tied to a particular vendor.
To effectively do that, we need to understand how Policies work in Conjur. First, we have the root policy, which acts as the top policy for that account. It can contain all the users, groups, hosts and variables required to describe our organization. Below that root policy we assign branch policies, which are more specific for our deployments and types of secrets we manage.
Within the root policy we need to define an initial set of admin users and groups for the whole organization, only. We then use branches to refine that access and permissions for each defined variable.
The key thing to understand here is the layering of the branches and how to use different policies for different situations. We can categorize our first set of policies based on environments; for example, Development or Production environment. Then, each application has its own policies that control the access of secrets and permissions.
For our case, it makes sense to have a branch that can be used for each infrastructure provider; for example, an AWS policy and an Azure policy that sits on top of some other branches. We use those policies as sort of a namespace parameter for assigning branches into them. That way we can refer to them as:
cucumber:policy:aws/develop
cucumber:policy:azure/production
cucumber:policy:ds1/qa
cucumber:group:ds1/qa/testers
cucumber:group:azure/develop/developers
cucumber:group:aws/production/admins
You can use any Infrastructure naming conventions, according to your specific needs.
Let’s create our root policy first. We use it to define the admin group, which is the owner of the system policies, environments and infrastructures.
$ cat << ENDL > root.yml
# root.yml
- !group admin
- !permit
  role: !group admin
  privileges: [ read, create, update ]
  resource: !policy root
ENDL
Log in as admin and load the policy as root:
$ conjur authn login -u admin
Please enter admin's password (it will not be echoed):
Logged in

$ conjur policy load root root.yml
Loaded policy 'root'
  {
    "created_roles": {
  },
    "version": 1
  }
After each step it’s good practice to view the list of loaded objects:
$ conjur list
[
"cucumber:policy:root",
"cucumber:group:admin"
]
Next, look at the system policies. If using a custom authenticator such as AWS IAM or Kubernetes, you can define a policy. For example:
$ cat << ENDL > auth-ldap.yml
- !policy
  id: conjur
  owner: !group admin
  body:
    - !policy authn-ldap
    - !policy authn-iam/2884274272
ENDL
Next, define the users and groups that will be used to assign permissions and roles for each resource. Let’s create 4 groups and 4 users:
$ cat << ENDL > users.yml
- !group
  id: security_admin
  owner: !user admin

- !group
  id: developers
  owner: !group security_admin

- !group
  id: developers-admin
  owner: !group security_admin

- !group
  id: operations-admin
  owner: !group security_admin

# list the users
- !user
  id: alex.gavin
  owner: !group security_admin

# list the users
- !user
  id: mike.utah
  owner: !group security_admin

# list the users
- !user
  id: lisa.moran
  owner: !group security_admin

# list the users
- !user
  id: rory.hunter
  owner: !group security_admin

# add users to groups
- !grant
  role: !group developers-admin
  members:
    - !user mike.utah

- !grant
  role: !group operations-admin
  members:
    - !user lisa.moran

- !grant
  role: !group developers
  members:
    - !member
      role: !group developers-admin
    - !user rory.hunter
ENDL
Specific entitlements will be assigned for each user in another policy. When you load the policy under root, a list of keys for each user created is returned:
$ conjur policy load root users.yml
Loaded policy 'root'
{
"created_roles": {
"cucumber:user:alex.gavin": {
"id": "cucumber:user:alex.gavin",
"api_key": "jc3cna111zbfwz7rr962v8fn7x1g9tcz050rwkkypdgvq32maxar"
},
"cucumber:user:mike.utah": {
"id": "cucumber:user:mike.utah",
"api_key": "1mmrm3534vnddz22c4dys32bsaf83m0hgdj2x2padp15cp77w1xzyz1p"
},
"cucumber:user:lisa.moran": {
"id": "cucumber:user:lisa.moran",
"api_key": "2r48vf11c2sd78h8554v2zcc0c221e04jp5g40chrrycvc1kc4d6b"
},
"cucumber:user:rory.hunter": {
"id": "cucumber:user:rory.hunter",
"api_key": "bxarfc36hh36vjvk2c761zkvd1s2qpb73kea1be9j5xc41jzxm8h"
}
},
"version": 2
}
Another categorization is needed for the different cloud or on-prem infrastructure. Let’s create that now:
$ cat << ENDL > providers.yml
- !policy
  id: aws
  owner: !group security_admin

- !policy
  id: azure
  owner: !group security_admin
ENDL

$ conjur policy load root providers.yml
Create policies for two environments – develop and production. They can either be loaded using the same file, or a separate one for each environment under each provider:
$ cat << ENDL > environments.yml
- !policy
  id: develop
  owner: !group /developers-admin

- !policy
  id: production
  owner: !group /operations-admin
ENDL

$ ~/.gems/bin/conjur policy load azure environments.yml
$ ~/.gems/bin/conjur policy load aws environments.yml
Let’s review what we have now:
$ ~/.gems/bin/conjur list
[
...
"cucumber:policy:aws",
"cucumber:policy:azure",
"cucumber:policy:aws/develop",
"cucumber:policy:aws/production",
"cucumber:policy:azure/develop",
"cucumber:policy:azure/production"
]
Note
Multiple branches can be added under the same Layer. For example, if we were to include Amazon STS credentials, then we could use the following policy:
$ cat < sts.yml
---
- !policy
  id: sts
  body:
    - !policy
      id: blog-app
      body:
    # Secret Declarations
        - &secrets
          - !variable accessKey
          - !variable secretAccessKey

# === Layer for Automated Secret Access ===
    - !policy
      id: hosts
      annotations:
        description: Layer & Host Factory for machines that can read secrets
      body:
        - !layer
        - !host-factory
          layer: !layer

ENDL
We load them under AWS:
$ conjur policy load aws sts.yml
After that, we need to include the necessary permissions in the entitlements.yml file.
- !grant
  role: !group developers
  member: !layer aws/sts/hosts
- !permit
  role: !group developers
  privileges: [ read, execute ]
  resource: !variable aws/sts/blog-app/accessKey
- !permit
  role: !group developers-admin
  privileges: [ read, execute, update ]
  resources: !variable aws/sts/blog-app/accessKey
- !permit
  role: !group developers
  privileges: [ read, execute ]
  resources: !variable aws/sts/blog-app/secretAccessKey
- !permit
  role: !group developers-admin
  privileges: [ read, execute, update ]
  resources: !variable aws/sts/blog-app/secretAccessKey
And we load them under root:
$ conjur policy load entitlements.yml
Loaded policy 'root'
{
  "created_roles": {
  },
  "version": 4
}
The above permissions will allow the developers group to read the STS credentials, but the developers-admin to update them.
If you have policies per regions – for example for EU, US, ASIA – you could load them for each provider, like this:
“cucumber:policy:aws/eu/develop”,
“cucumber:policy:aws/us/production”
Writing policies should ideally match the hierarchy profiles of your organization, for consistency and convention.
Here is how to add another categorization for frontend and backend roles:
$cat << ENDL > sides.yml
- !policy
  id: backend

- !policy
  id: frontend
ENDL

$ conjur policy load azure/develop sides.yml
$ conjur policy load aws/develop sides.yml

$ conjur list
[
...
  "cucumber:policy:aws/develop/backend",
  "cucumber:policy:aws/develop/frontend"
  "cucumber:policy:azure/develop/backend",
  "cucumber:policy:azure/develop/frontend"
]
At the end, you need policies for your applications. Create a blog-app.yaml file that represents a policy for a blog application that connects to a database using a connection URL:
$cat << ENDL > blog-app.yml
- !policy
  id: blog-app
  body:
    - &variables
      - !variable db-connection-url

    - !group secrets-blog-app

# secrets-blog-app can read and execute
    - !permit
      resource: *variables
      privileges: [ read, execute ]
      role: !group secrets-blog-app
ENDL

$ ~/.gems/bin/conjur policy load aws/develop/backend blog-app.yml
$ ~/.gems/bin/conjur policy load azure/develop/backend blog-app.yml

$ conjur list
[
...
"cucumber:variable:azure/develop/backend/blog-app/db-connection-url",
"cucumber:group:azure/develop/backend/blog-app/secrets-blog-app",
"cucumber:policy:aws/develop/backend/blog-app",
"cucumber:variable:aws/develop/backend/blog-app/db-connection-url",
"cucumber:group:aws/develop/backend/blog-app/secrets-blog-app"
]
As you can see, we can verify the list of objects that are within the proper namespace.
To apply permissions to each group and user, a separate file is needed for user entitlements.yml that are loaded from the root account. This requires a good amount of planning and checking in order to apply the right permissions for each group, user and layer.
A typical role assignment:
$cat << ENDL > entitlements.yml
- !grant
  role: !group azure/develop/backend/blog-app/secrets-blog-app
  member: !group developers

- !grant
  role: !group aws/develop/backend/blog-app/secrets-blog-app
  member: !group developers
ENDL

$ conjur policy load root entitlements.yml
The above policy allows the developers group to be a member of the azure/develop/backend/blog-app/secrets-blog-app and aws/develop/backend/blog-app/secrets-blog-app groups, and grants them access to the secrets-blog variables to connect to the database. This granular level of permissions is leveraging the true power of RBAC in practice.
Verify that this holds by issuing the following command; Yes means that the particular resource has permissions to access the variable:
$ conjur check group:developers variable:azure/develop/backend/blog-app/db-connection-url
Yes
All the permissions of a resource can be listed by issuing:
$ conjur show variable:azure/develop/backend/blog-app/db-connection-url
{
"created_at": "2019-07-31T15:36:09.262+00:00",
"id": "cucumber:variable:azure/develop/backend/blog-app/db-connection-url",
"owner": "cucumber:policy:azure/develop/backend/blog-app",
"policy": "cucumber:policy:azure/develop/backend",
"permissions": [
{
"privilege": "read",
"role": "cucumber:group:azure/develop/backend/blog-app/secrets-blog-app",
"policy": "cucumber:policy:azure/develop/backend"
},
{
"privilege": "execute",
"role": "cucumber:group:azure/develop/backend/blog-app/secrets-blog-app",
"policy": "cucumber:policy:azure/develop/backend"
}
],
"annotations": [

],
"secrets": [

]
}
Now that policies are defined, the last step is to populate the variables with secrets and try to access them from the clients.
Step 3 – Defining and Consuming Secrets
With policies defined describing access controls, let’s see how to store and retrieve sensitive variables across the multi-cloud infrastructure.
Nearly everything can be stored as a string or binary in Conjur. As a representative example, we will store the db-connection-url for our Blog application under Azure. This example could be extended to cover all sorts of secrets and sensitive values, from SSL certificates, CI/CD credentials, account credentials (such as AWS, GCE or Azure), and more.
To store the db-connection-url:
Logout from admin and login as mike.utah – a member of developers-admin.
$ conjur authn logout
  Logged out
$ conjur authn login -u mike.utah
  Please enter mike.utah's password (it will not be echoed):
  Logged in
When we login with that user and issue a list command, all the variables that user can read or update are shown:
$ conjur list
"cucumber:variable:aws/sts/blog-app/accessKey",
"cucumber:variable:aws/sts/blog-app/secretAccessKey",
"cucumber:policy:aws/develop",
"cucumber:policy:azure/develop",
"cucumber:policy:azure/develop/backend",
"cucumber:policy:azure/develop/frontend",
"cucumber:policy:azure/develop/backend/blog-app",
"cucumber:variable:azure/develop/backend/blog-app/db-connection-url",
"cucumber:group:azure/develop/backend/blog-app/secrets-blog-app",
"cucumber:policy:aws/develop/backend",
"cucumber:policy:aws/develop/frontend",
"cucumber:policy:aws/develop/backend/blog-app",
"cucumber:variable:aws/develop/backend/blog-app/db-connection-url",
"cucumber:group:aws/develop/backend/blog-app/secrets-blog-app"
]
We are only interested in the cucumber:variable:azure/develop/backend/blog-app/db-connection-url variable. Let’s store a secret there:
$ conjur variable values add azure/develop/backend/blog-app/db-connection-url "mysql://blog_root:[email protected]/blog_db"
Next, check it’s value, making sure to url escape the variable value first:
$ conjur variable value azure%2Fdevelop%2Fbackend%2Fblog-app%2Fdb-connection-url
mysql://blog_root:[email protected]/blog_db
Accessing secrets from our application should be a piece of cake now. We might need to add additional machine identity users with a read-only access for those secrets. I leave it for the reader to do that.
For reference, Conjur provides APIs for the following languages:
● .NET
● Go
● Java
● Ruby
A REST API is also available. The detailed docs are located on this page, and we strongly recommend you explore all the options there.
Overall, we can say that the most critical part of setting up a complete secrets solution with Conjur lies in the effective application of policies and permissions. After that step is finished, the process becomes streamlined and secure by default. To learn more about Conjur, visit the official Website.
Continue The Conversation!
If you enjoyed this project or have questions join me on the CyberArk Commons. You can network with other engineers, ask for help, and contribute to the future of Conjur OSS.

Theo Despoudis is a Senior Software Engineer and an experienced mentor. He has a keen interest in Open Source Architectures, Cloud Computing, best practices and functional programming. He occasionally blogs on several publishing platforms and enjoys creating projects from inspiration.