
In today’s world of cloud environments, deployments often use infrastructure as code (IaC). IaC deployments use a domain-specific language (DSL) to create a skeleton definition file and a parameters file. This allows for automated, immutable deployment.
Popular tools IaC tools include Azure Resource Manager (ARM), Azure Quickstart Templates, AWS CloudFormation, and Terraform from HashiCorp, which supports multiple cloud environments.
Virtual machine (VM) deployments often require additional software configuration, applications, and settings. For these deployments, you use configuration as code (CaC) solutions. Commonly used tools are Ansible, Chef, Puppet, and PowerShell Desired State Configuration, to name a few.
In both IaC and CaC scenarios, automated deployment and configuration typically require storing or handling secrets. This includes local VM admin accounts and passwords, or a database connection string inside a web application config file, or an access token to connect to cloud storage to download software from.
So, the big question is, where do you store these secrets? Preferably, you keep them in a centralized location. This location is not specific to a single infrastructure or CaC scenario. Conjur from CyberArk is a superb option for secrets storage, as it answers several of these requirements:
- It is not limited to integrate with a specific tool or software. Conjur allows integration with any DevOps tool.
- Besides storing traditional secrets, Conjur also provides an answer to managing authentication, authorization, and role-based access control (RBAC).
- It makes custom integrations possible using REST API.
- The workload is containerized, which means it’s multi-platform and ready out-of-the-box without requiring any specific server or Operating System (OS) tooling.
Our Hands-on Tutorial
This article demonstrates how to use a combination of Terraform, Ansible, and Conjur. We’ll use Terraform to deploy Azure VMs, Ansible integrated with Terraform to configure a VM as a web server, and Conjur to store secrets.
Terraform is available as an open-source solution, which you can download from the Terraform website. The two sample template files are based on the files in the Terraform sample repository on GitHub. Ansible is an open-source solution available for download from the Ansible website. Conjur from CyberArk is a free Docker container, which you can download from the Conjur website.
In this tutorial, Microsoft Azure is our target VM environment using a free trial subscription.
Deploying the Ubuntu Azure VMs Using Terraform
There are many ways to deploy an Azure VM. We can use the Azure portal, Azure CLI (which opens a Bash session), Azure PowerShell, ARM templates, and Terraform. For this tutorial, we’ll be using Terraform.
Our deployment is based on Azure Cloud Shell is for ease of use and accessibility across all operating systems and devices. Since Terraform comes with Azure Cloud Shell, all we need to do is copy the Terraform deployment file into the Azure Cloud Shell.
The sample ansible.tf file contains the following Azure resources:
- Ansible Resource Group
- Ubuntu 18.04 VMs (ubuntuclient and ansiblevm)
- Public IP address resource for the ansible client (SSH remote management)
- Network Security Group, allowing SSH on port 22
- VM admin credentials
Setting Up
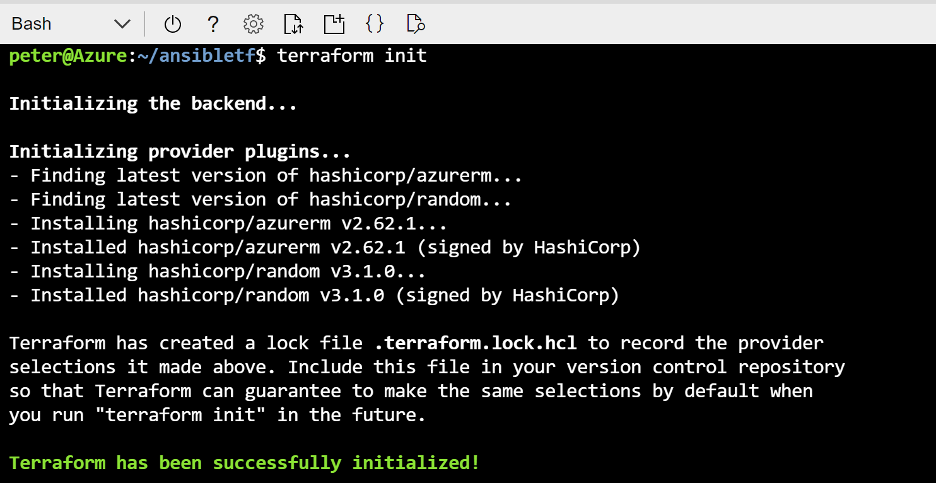
On the Azure portal, select Cloud Shell, and choose the Bash option. Create a new subfolder named “ansibletf” and copy the ansible.tf terraform file into this folder. In the “ansibletf” subfolder, run terraform init to initialize the Azure Provider for Terraform. This takes a few minutes.
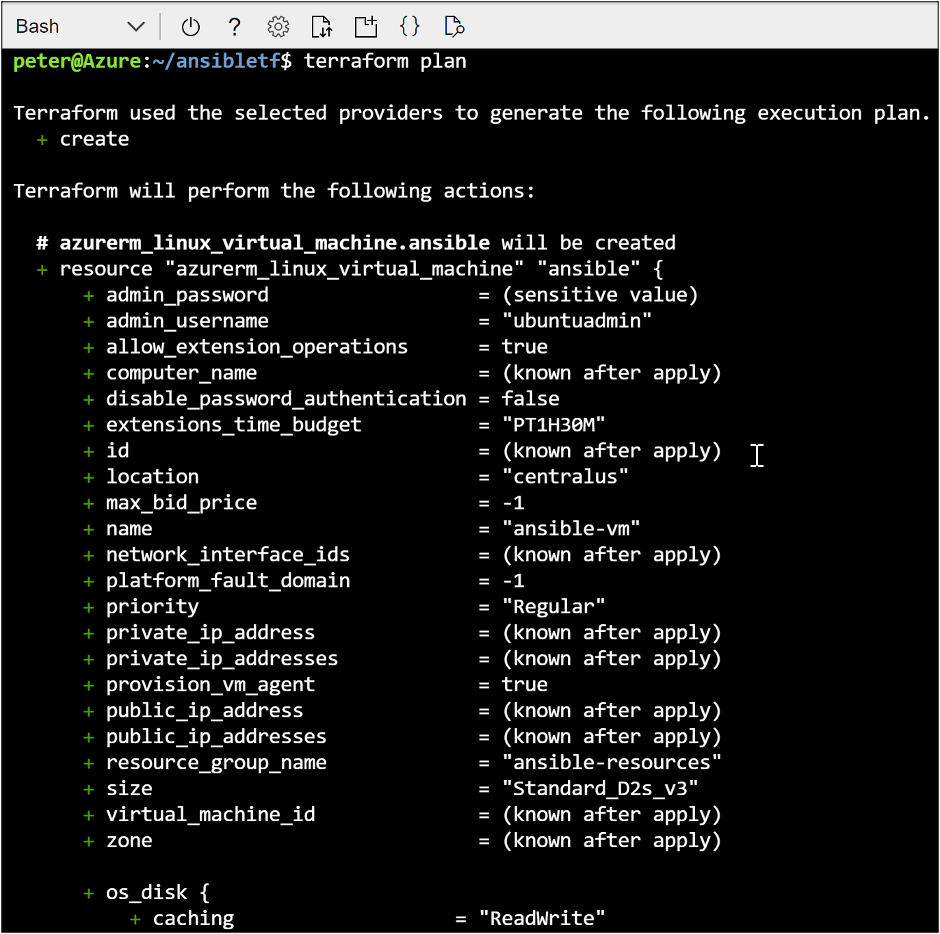
When the Terraform init task completes, execute terraform plan. This performs a pre-flight validation of the template file and shows what and how many resources Terraform will deploy.
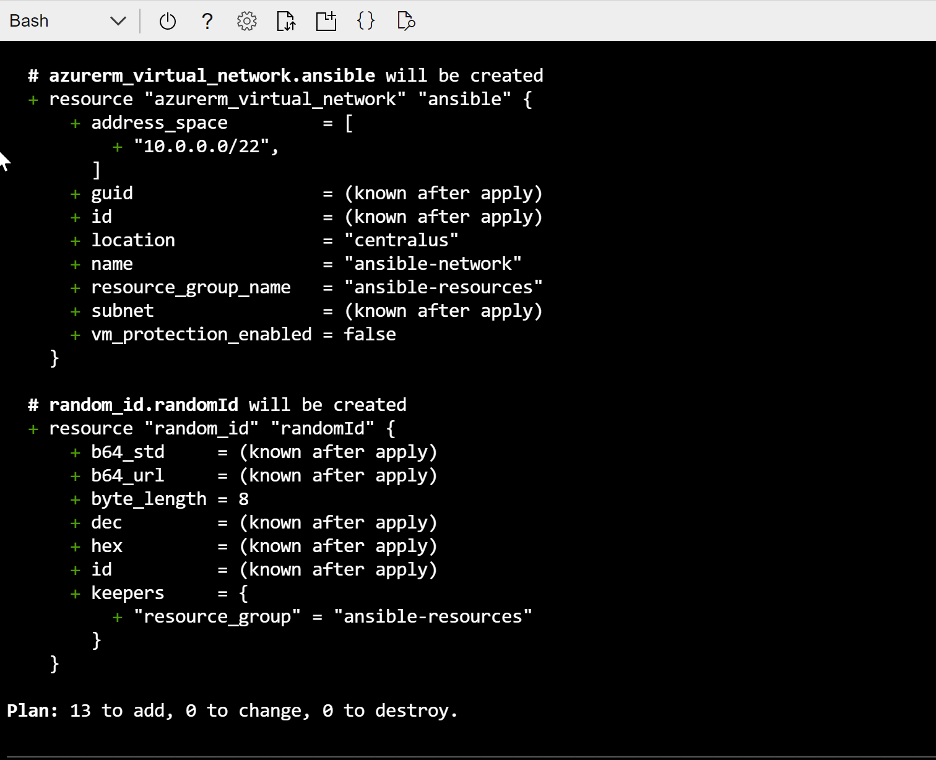
At the end of the plan stage, Terraform summarizes the number of Azure resources.
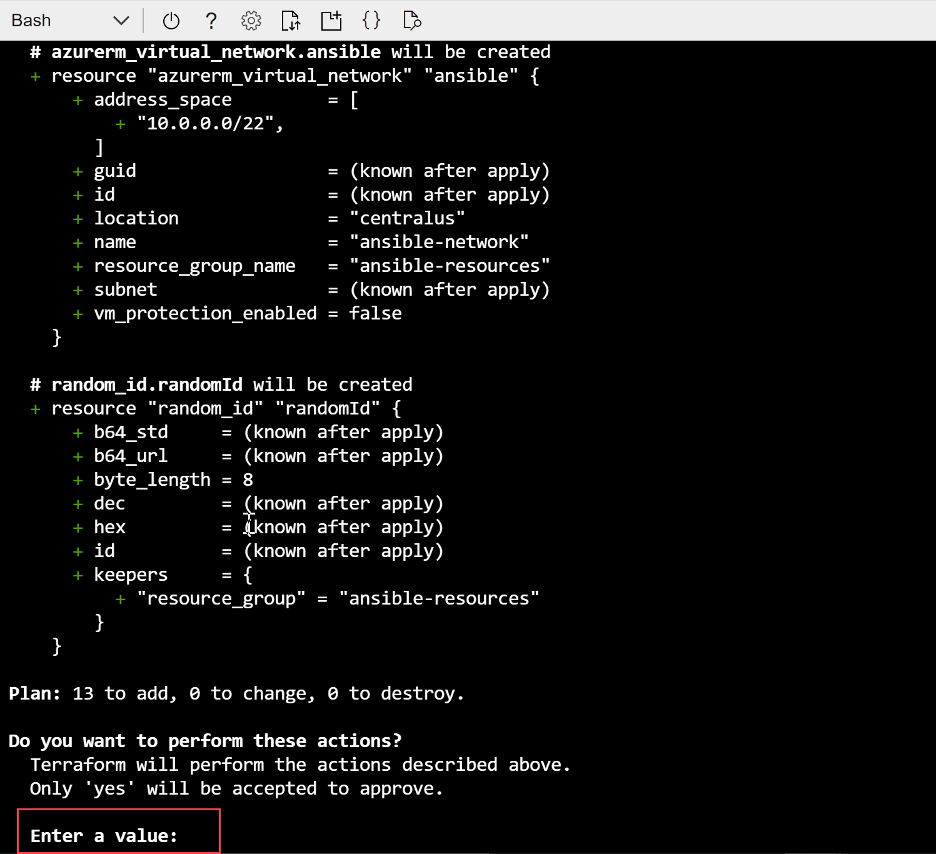
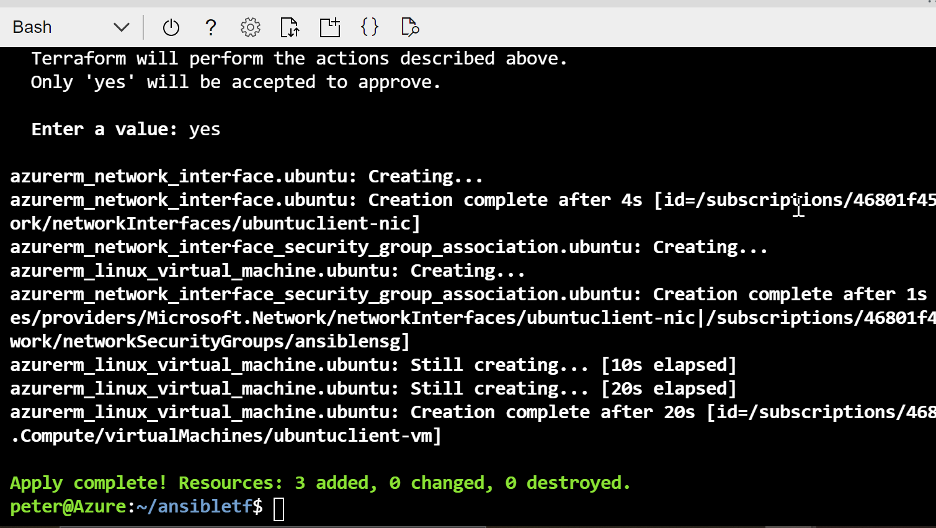
Last, kick off the actual Azure resource deployment by executing terraform apply, and confirming the deployment by typing “yes” when prompted to enter a value.
Wait for the deployment task to complete successfully. You should see Apply Complete!
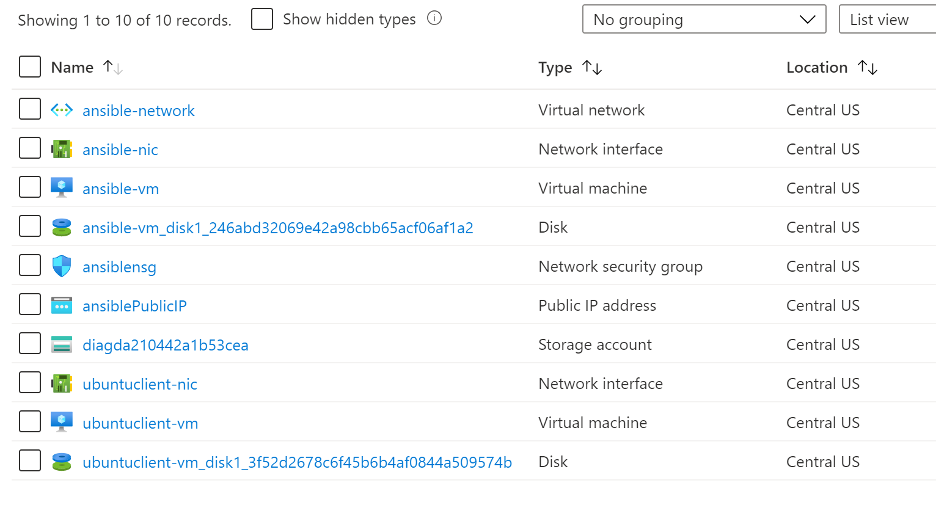
On the Azure portal, find the ansible-resources resource group and take note of the different Azure resources.
Select the ansible-vm resource, and note its public IP address. You’ll need this for the SSH remote connection to the Ansible VM in the next step.
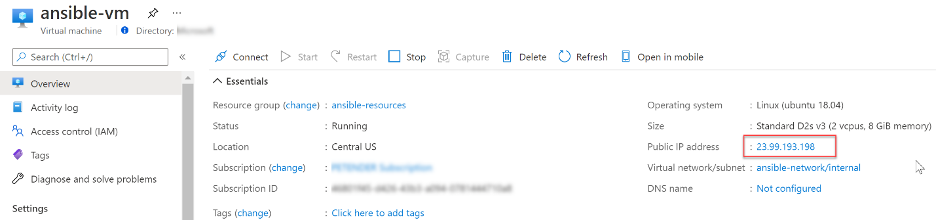
This completes the installation of two Linux Ubuntu 18.04 VMs in Azure, using Terraform.
Configuring the Ansible VM Resource with Ansible Tools
The following steps involve installing Ansible on the second Linux VM deployed earlier. It acts as the Ansible host.
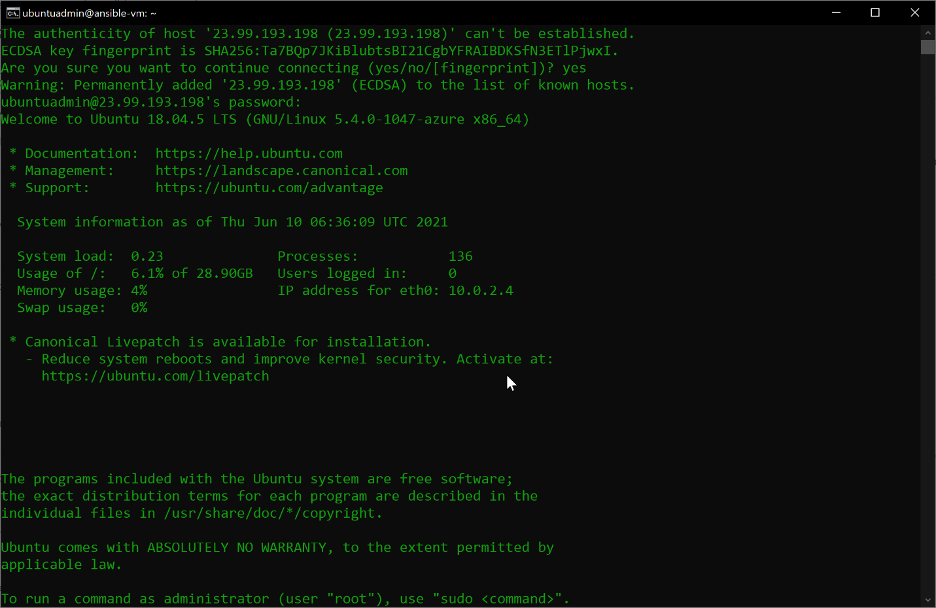
Open an SSH-connection to ansible-vm, using the following command:
ssh ubuntuadmin@<publicip>
Run the Ansible install by executing the following command:
sudo apt-get update
This results in the following sequence of tasks, which install the necessary prerequisites for Ansible, as well as specific Azure Packages for the VM:
sudo apt install python3-pip
sudo -H pip3 install --upgrade pip
sudo -H pip3 install ansible[azure]
sudo apt-add-repository --yes --update ppa:ansible/ansible
sudo apt install ansible
sudo ansible-galaxy collection install azure.azcollection
curl -O https://raw.githubusercontent.com/ansible-collections/azure/dev/requirements-azure.txt
sudo pip3 install -r requirements-azure.txt
Validate the install by executing the ansible command:
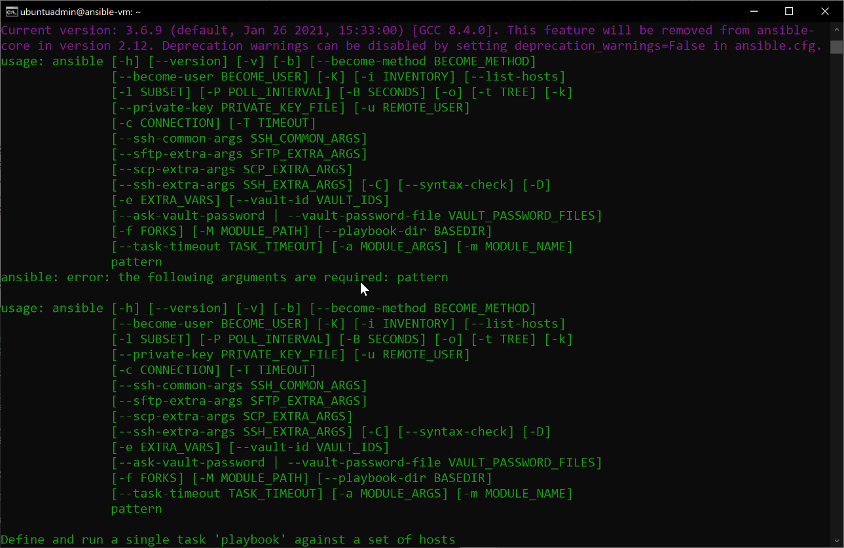
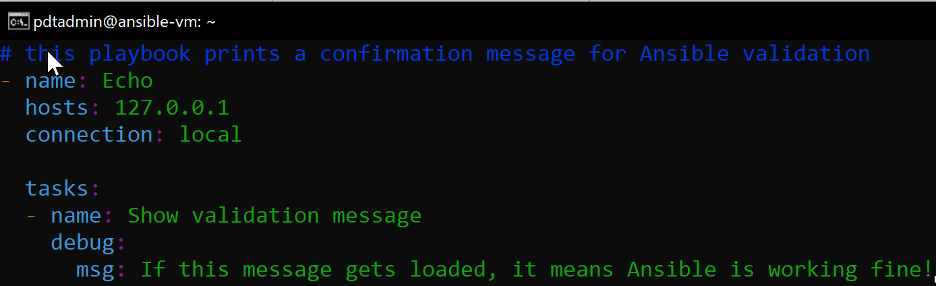
Let’s create a basic Ansible playbook to ensure the Ansible service is working as expected. On the Ansible VM, create a new file named “demoplaybook.yml” and provide the following information as content:
# this playbook prints a confirmation message for Ansible validation
- name: Echo
       hosts: 127.0.0.1
     connection: local

     tasks:
     - name: Show validation message
       debug:
      msg: If this message gets loaded, it means Ansible is working fine!
Test the demoplaybook.yml by executing the following command:
ansible-playbook demoplaybook.yml
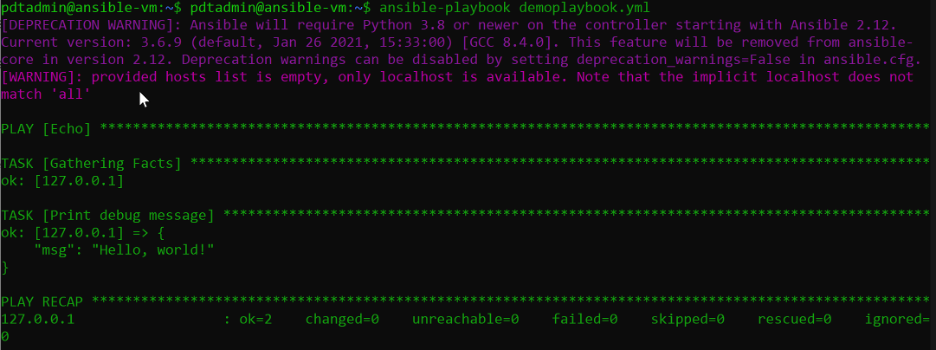
This confirms Ansible is running fine. We’ll come back to Ansible for VM configuration steps later.
Deploying Conjur Open Source using Docker Containers
Conjur is an open-source Docker Container, which you can download from the GitHub repository.
Conjur uses Docker Compose to builds a series of dependent containers to run the solution. Most instructions are available in the same repository referenced above. The setup used for this article was an Ubuntu Server 18.04, running in Azure and hosting Docker CE.
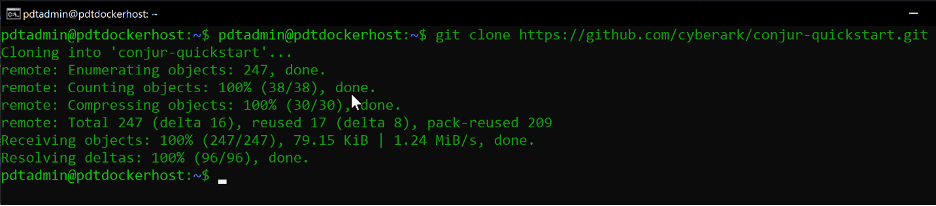
On the Ubuntu Docker host, initiate the Conjur quick start git clone command to download all necessary files to your Docker host:
git clone https://github.com/cyberark/conjur-quickstart.git
In the conjur-quickstart subdirectory, run the Docker command to download the necessary container images from the Docker Hub registry:
docker-compose Pull
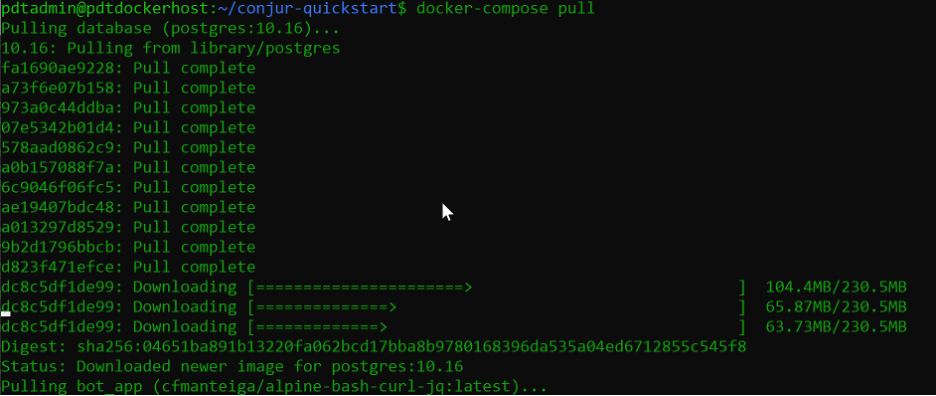
Wait for the download of the different Docker images to complete.
Now, generate a master key using the following commands:
docker-compose run --no-deps --rm conjur data-key generate > data_key

export CONJUR_DATA_KEY="$(< data_key)"

Note that if you shut down your Docker host and start the Conjur containers again, you must repeat this step. Otherwise, the main Conjur container will be in a reboot loop. You should also check the Conjur documentation on how to configure persistent data storage.
The configuration is now ready to run the Conjur containerized workload. Start up the container images by running the following command:
docker-compose up -d
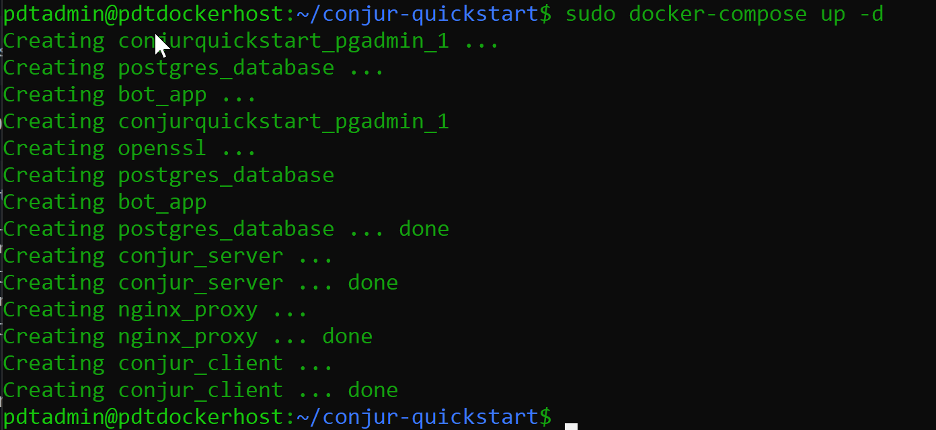
Wait for the containers to start up and run successfully.
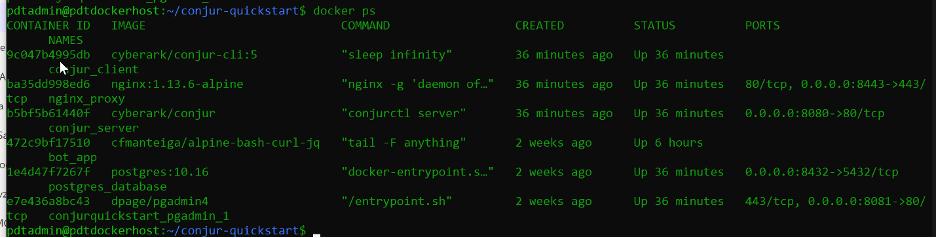
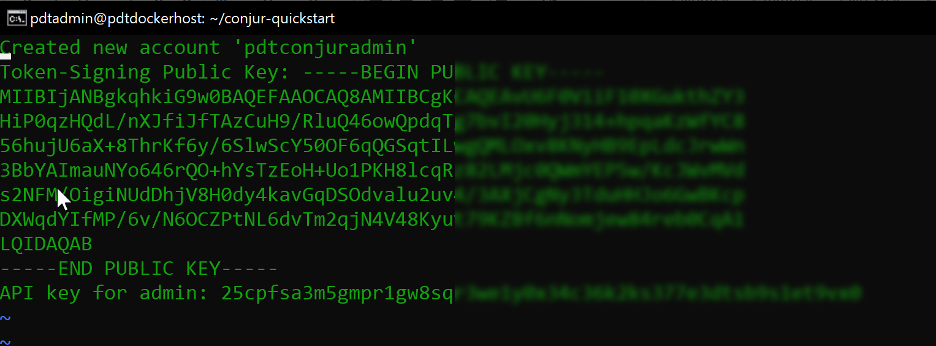
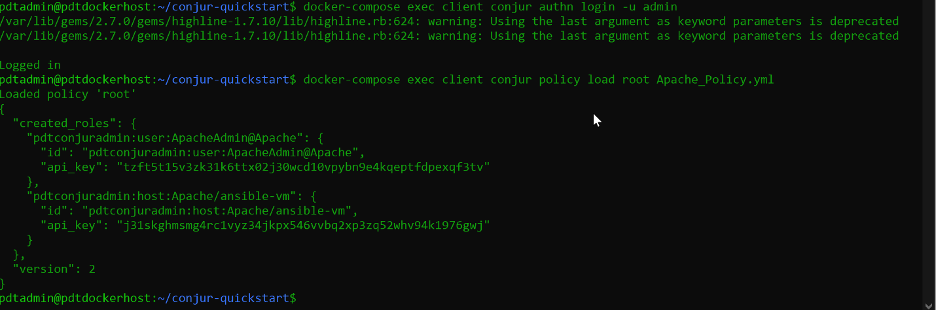
With all Conjur related containers up and running, the last step involves creating a Conjur admin account (pdtConjuradmin is the account name here). It also involves establishing a link between this admin account and the Conjur workload by running the following commands:
docker-compose exec conjur conjurctl account create pdtconjuradmin > admin_data

docker-compose exec client conjur init -u conjur -a pdtconjuradmin

In the conjur-quickstart folder, open the file admin_data and copy the “API key for admin” value aside.
Run the following command to log in to Conjur:
docker-compose exec client conjur authn login -u admin
Paste in the API key you copied earlier when prompted.

You can also validate the account you logged in with by executing the following command:
docker-compose exec client conjur authn whoami

Before we can integrate Conjur with Ansible, we must create a Conjur policy definition. In this example, the policy definition creates a user and password with admin permissions and points to a host that can read out this information. The configuration simulates access to an Apache webserver.
- !policy
  id: Apache
  body:
    # Define users, hosts and secret variable
  - !user ApacheAdmin
  - !host ansible-vm
  - !variable ApachePw
  - !permit
    # Give read and write permissions to the administrator.
    role: !user ApacheAdmin
    privileges: [read, update, execute]
    resource: !variable ApachePw
  - !permit
    # Give read permissions to the Ansible host account to retrieve the password.
    role: !host ansible-vm
    privileges: [read, execute]
    resource: !variable ApachePw
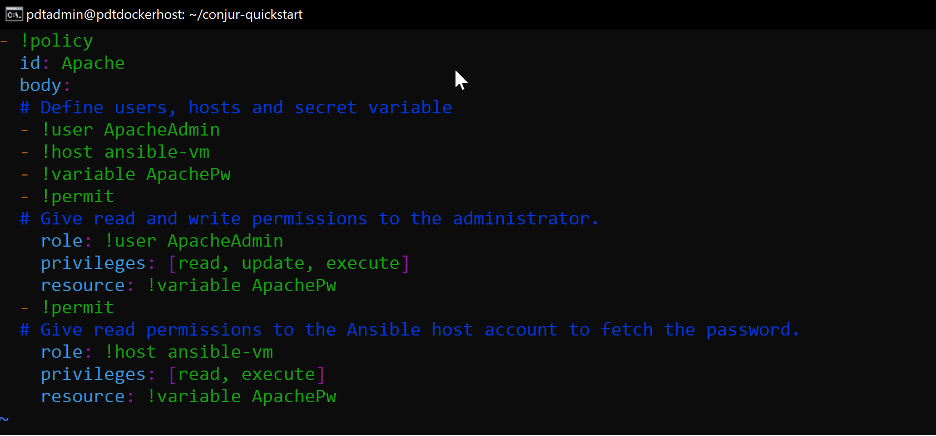
Save the file as Apache_Policy.yml. Upload this policy into the Conjur tooling by running the following commands:
docker cp Apache_Policy.yml conjur_client:Apache_Policy.yml
docker-compose conjur policy load root Apache_Policy.yml
Next, we write the actual account password to the Conjur vault.
docker-compose exec client conjur variable values add Apache/ApachePw Password123!
We get the confirmation “Value added” when it completes.

The account information is for retrieval of the secrets in the Conjur secret store.
This completes the steps to deploy and set up a Conjur environment using the open-source Docker container model and creating a sample Conjur policy file for an Apache Web Server.
Integrating Ansible with Conjur
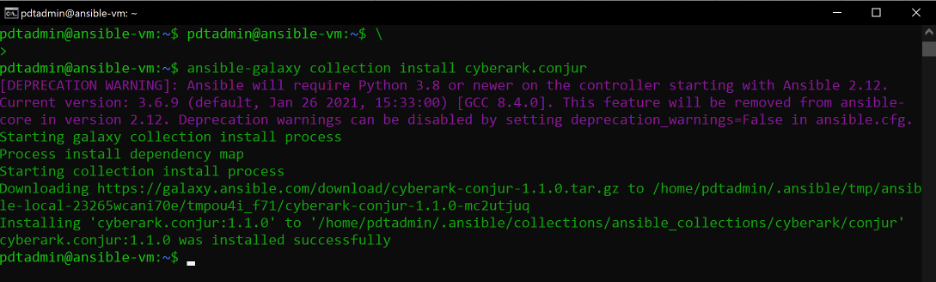
To provide Ansible with the necessary functionality to connect to Conjur and read out secrets, we must install the Conjur provider on the Ansible server.
ansible-galaxy collection install cyberark.conjur
Configure the Ansible-VM with a Conjur identity by adding the following roles into your Ansible playbook. We use them to deploy Apache:
hosts: apache
roles:
  - role: cyberark.conjur.conjur-host-identity
    conjur_appliance_url: http://conjur,
    conjur_account: ‘pdtconjuradmin’,
    conjur_host_factory_token: “{{ lookup ‘env’, ‘HF_TOKEN’)}}”
    conjur_host_name: “{{Conjur}}”
Create the apacheinstall.yml playbook using the following code snippet:
---
- hosts: apache
  roles:
     - role: cyberark.conjur.conjur-host-identity
       conjur_appliance_url: http://conjur,
       conjur_account: ‘pdtconjuradmin’,
       conjur_host_factory_token: “{{ lookup ‘env’, ‘HF_TOKEN’)}}”
       conjur_host_name: “{{Conjur}}”

tasks:
    - name: install apache
      apt:
         name: apache2
         state: latest
      become: yes
    - name: create index.html
      copy:
          content: "this is a sample Ansible Conjur playbook"
          dest: /var/www/html/index.html
      become: yes
    - name: restart apache2
      service:
           name: apache2
           state: restarted
           enabled: yes
      become: yes
Execute the playbook by running the following command:
ansible-playbook installapache.yml
This deploys Apache to the Ubuntu-clientVM we deployed with Terraform at the beginning of this article, picking up the necessary user credentials from the Conjur secret store.
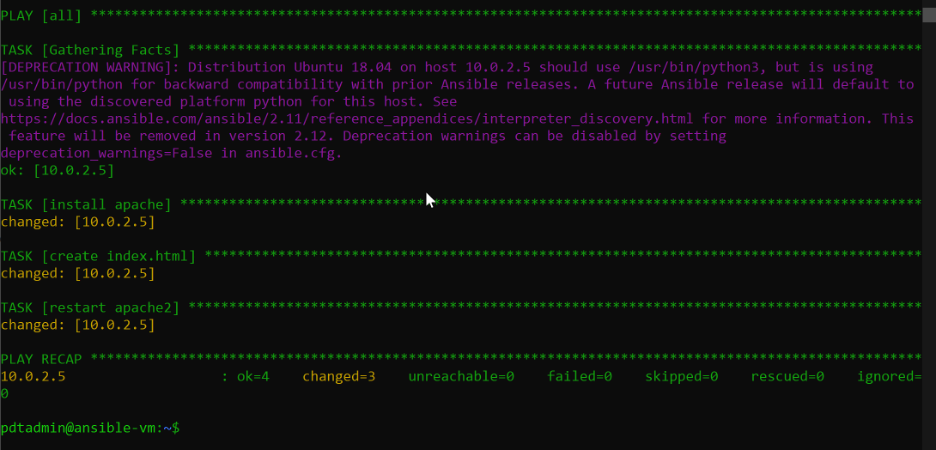
Validate that the Apache webserver is running, by executing this curl-command:
curl http://10.0.2.5
The command shows the content of the index.html file.

This completes the process to deploy Apache using an Ansible playbook, using secrets stored in the Conjur secrets store.
If you want, you can run the Apache webserver using ServiceD Service Manager together with Summon (installed with the Conjur Ansible extension). The ServiceD file looks something like this:
[Unit]
Description=Apache
After=network-online.target

[Service]
User=Apache/ApacheAdmin
ExecStart=/usr/local/bin/summon --yaml 'APACHE_PASSWORD: !var root/Apache/ApachePw' /usr/apache/bin/apachectl start
ExecReload=/usr/local/bin/summon --yaml 'APACHE_PASSWORD: !var root/Apache/ApachePw' /usr/apache/bin/apachectl graceful
ExecStop=/usr/local/bin/summon --yaml 'APACHE_PASSWORD: !var root/Apache/ApachePw' /usr/apache/bin/apachectl stop
This is where it picks up the APACHE_PASSWORD variable from the Conjur secrets store, for which we created the Apache/ApachePw role and account.
That’s all it takes to store your secrets securely!
Summary
In this article, we reviewed the challenge of storing and using secrets when running IaC with Terraform, CaC using Ansible, and how you can use CyberArk Conjur as a secrets store. We’ve explored how you can define accounts and corresponding roles, as well as protecting your secret credentials. The example we used is an Apache Web Server, but you could use this for other web application credentials as well as database service credentials and other things.
Ready to try for yourself? Check out Conjur and Ansible.

Darren Khan is a Solutions Engineer at CyberArk, where he specializes in all things that require programmatic access. He loves designing new systems that automate away the mundane tasks that every administrator faces.