By default, Kubernetes uses Base64 encoding to store information such as application credentials, keys, and certificates. Unfortunately, this Base64 encoding offers inadequate security. To prevent security breaches, you need to implement several security best practices. Deploying open-source solutions like CyberArk Conjur means you can secure your information with secrets management.
Conjur offers a scalable and centralized approach to managing secrets. You can limit secrets access to only authorized users and hosts. Also, you can update, rotate, and manage credentials for datastores and other sensitive data. Conjur’s capabilities and design principles include machine identity, auditing, centralized role-based access control (RBAC), duty segregation, monitoring, and more.
In this article, we’ll show you how to deploy CyberArk Conjur on Amazon Elastic Kubernetes Service (EKS), the managed Kubernetes platform. Then, we’ll deploy a Spring Boot application using a secretless broker to integrate with Conjur to retrieve database details. We’ll use Rancher for the complete setup.
Prerequisites
We’ll walk you through installing CyberArk Conjur on EKS, but you’ll need to have a few things in place:
- Access to a standalone Rancher instance since we’ll use Rancher Console to perform all steps.
- Access to an EKS cluster. Register the cluster with Rancher using your AWS keys. Optionally, you can use Rancher to create the EKS cluster (refer to Rancher documentation for details).
- Docker installed on your workstation.
Setting Up the Rancher Console
Rancher enables us to administer clusters across various platforms. The cluster dashboard lists all integrated clusters.
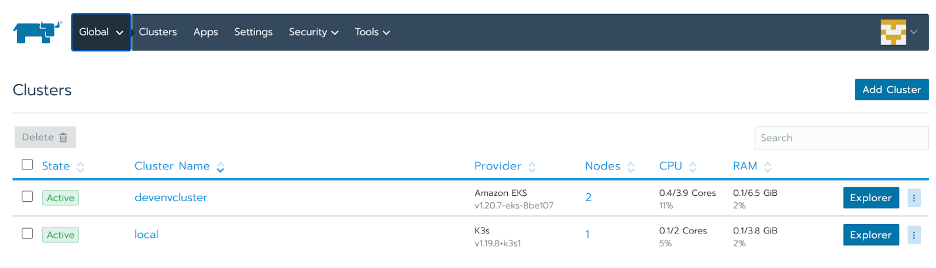
We can deploy the Rancher standalone instance in a K3s cluster which is part of managed clusters. First, we open the EKS cluster dashboard by clicking on the corresponding Explorer button.
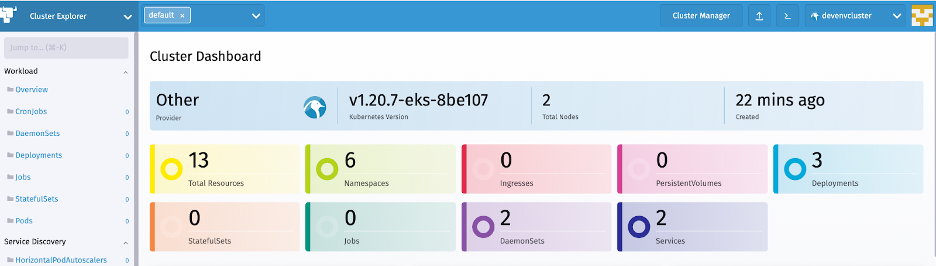
The Rancher Kubernetes dashboard provides an overview of the cluster resources. The left-hand navigation menu enables us to use different Kubernetes resources, like namespaces and deployments.
Kubernetes recommends deploying cross-cutting solutions like Conjur to their own namespaces. On the left-hand menu, we click Cluster then Namespace to get to the Namespace console.
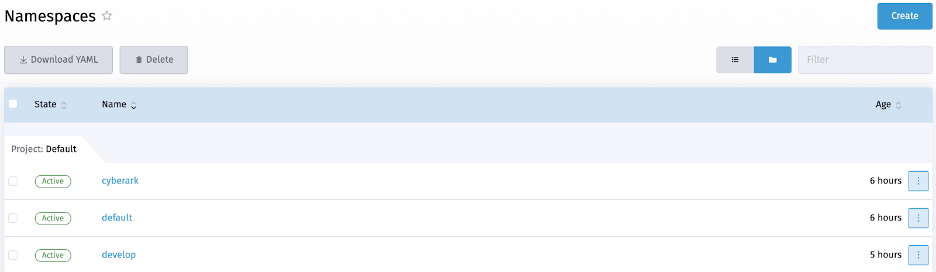
Then, we click the Create button to add a namespace named “Cyberark.”
Installing Conjur OSS
Rancher Apps and Marketplace is a curated list of Helm charts from Rancher and its ecosystem partners. It includes popular Helm charts for different requirements, including security, monitoring, logging, request analytics, and more. The console enables us to deploy a solution and perform upgrades quickly.
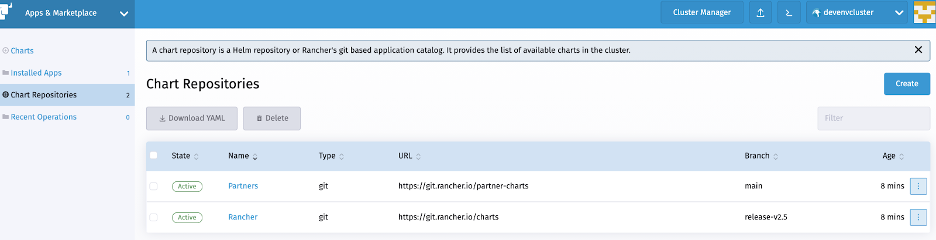
First, we add the Conjur Helm chart by clicking on the Create button in the Chart Repositories console.
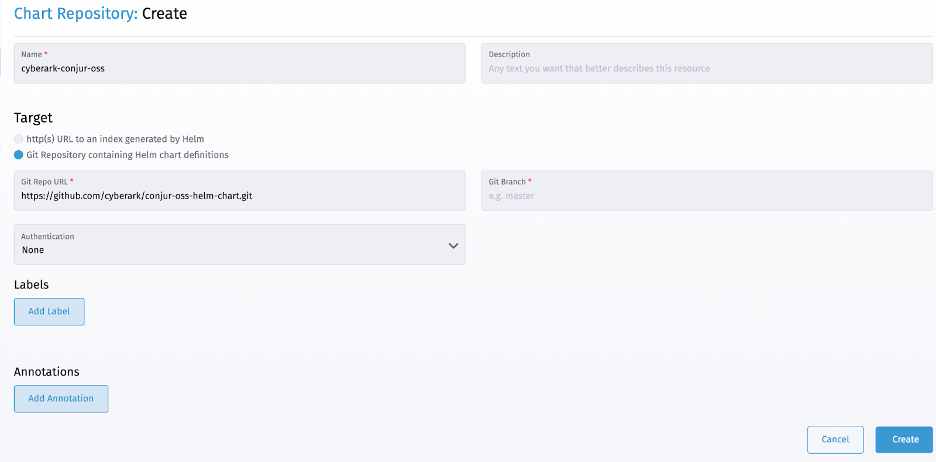
We now provide a chart name, like “cyberark-conjur-oss,” and the git location on the New Chart Repository form. We then add the chart by clicking the Create button.
Rancher then reads the specified repository and lists the solution with their latest available version on the available charts list.

Conjur deployment needs a data key to encrypt its database. Our Conjur installation stores this data key and uses it for all data saves and lookups. First, we generate a data key using this command:
$ docker run --rm cyberark/conjur data-key generate
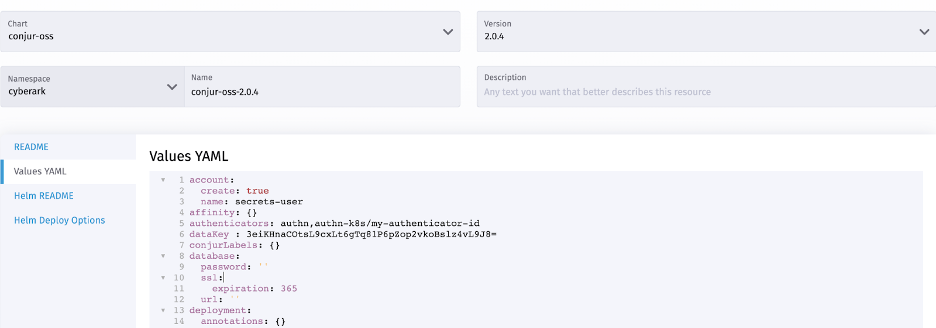
Then, we deploy Conjur by clicking on the newly-added “conjur-oss” chart to open a Helm Chart deployment dialog. The dialog enables us to specify the configuration and confirm our required attributes.
We select the cyberark namespace for Conjur deployment and update the values YAML file with these changes:
account:
  create: true
  name: secrets-user
authenticators: authn,authn-k8s/my-authenticator-id
dataKey: YOUR_DATA_KEY
These changes configure Conjur with the following needs:
- Conjure has a topology of organization accounts for secrets management. We can create an organization account during setup using account properties. Optionally, we can also add organization accounts after the installation.
- Conjure performs RBAC and authentication using various providers. By default, auth provider is enabled. We must enable the Kubernetes authentication provider by appending authn-k8s/my-authenticator-id on the authenticators Kubernetes authenticator uses Kubernetes APIs to authenticate pod, deployment, and other resources. Refer to Conjur’s documentation for details.
- We specify the generated data key using the dataKey
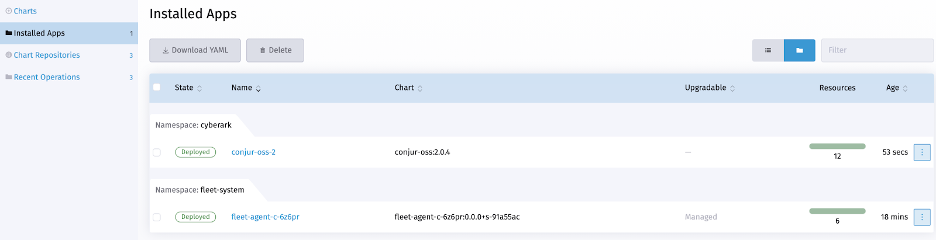
We must specify the name of the Helm release (like “conjur-oss-2”) in the name field and click the Install button.
In the current setup, Conjur also deploys a Postgres database. Optionally, we can connect to an externally deployed Postgres instance by specifying the required properties in the YAML file. Conjur prints only INFO logs by default, but we can change the logging level by setting the logLevel attribute to debug.
Rancher deploys Conjur and lists the Helm release under the Installed Apps left-hand navigation menu. We can make changes by clicking the associated action menu (…) and selecting the Edit/Upgrade option.
Configuring Policies and Secrets
Next, we need to access Conjur and configure our secrets management. Cyberark provides the Conjur command-line interface (CLI) for interacting with Conjur. We can deploy Conjur CLI from the Deployments left-hand menu of Cluster Explorer.

Next, we open the Deployment dialog by clicking the Create button. We copy the deployment specification below to the YAML editor and click Deploy.
---
apiVersion: apps/v1
kind: Deployment
metadata:
  name: conjur-cli
  Namespace : cyberark
  labels:
    app: conjur-cli
spec:
  replicas: 1
  selector:
    matchLabels:
      app: conjur-cli
  template:
    metadata:
      name: conjur-cli
      labels:
        app: conjur-cli
    spec:
      containers:
      - name: conjur-cli
        image: cyberark/conjur-cli:5
        imagePullPolicy: Always
        command: ["sleep"]
        args: ["infinity"]
After the deployment completes, we next go to the Pods dashboard. Rancher provides options to view pod logs and access using a browser-based shell.
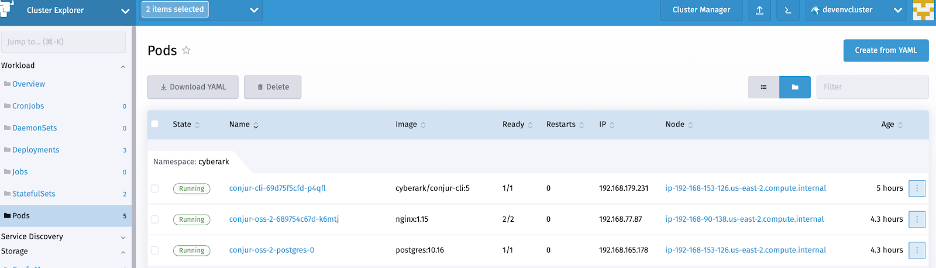
Conjur creates an admin user for all organization accounts. We can configure policies using this admin account.
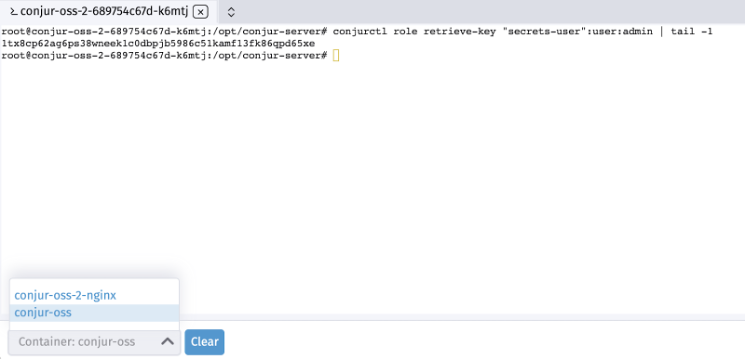
To configure policies, we first log into the Conjur-OSS pod to determine the admin account password. We connect by clicking the Execute Shell option from the pod actions menu (…) and executing this command:
$ conjurctl role retrieve-key "secrets-user":user:admin | tail -1
YOUR_ACCOUNT_PASSWORD
Next, we enter the deployed Conjur CLI console to configure policies and secrets. As a first step, we must initialize the CLI with the Conjur server location and organization account:
conjur init https://conjur-oss-2.cyberark.svc.cluster.local -a secrets-user
Then, we log in to Conjur using the admin user credentials:
conjur authn login -u admin -p YOUR_ACCOUNT_PASSWORD
After this, we configure the required policy for Secretless Broker access. Refer to Conjur’s documentation for details.
conjur policy load root policy.YAML
Next, we add policy-required variables using the commands below:
conjur variable values add "test-secretless-app-db/password" "TEST_APP_DB_PASSWORD"
conjur variable values add "test-secretless-app-db/username" "test_app"
conjur variable values add "test-secretless-app-db/url" "test-secretless-app-backend.develop.svc.cluster.local:3306"
conjur variable values add "test-secretless-app-db/port" "3306"
conjur variable values add "test-secretless-app-db/host" "test-secretless-app-backend.develop.svc.cluster.local"
The above variables provide details referring to a MySQL database deployed in the develop namespace.
Additionally, the Conjur Kubernetes authenticator requests SSL certificates for information exchange. We generate these certificates on the Conjur-OSS pod using these commands:
CONJUR_ACCOUNT=secrets-user
rake authn_k8s:ca_init['conjur/authn-k8s/my-authenticator-id']
We have successfully configured Conjur with all its secrets. Now, we can deploy an application with Secretless Broker, which uses this information.
Deploying the Application
The demo Spring Boot application provides APIs for pet store information. This application deploys with a Secretless Broker sidecar and needs to access a MySQL instance.
First, we create the required MySQL deployment spec using the Rancher deployment console.
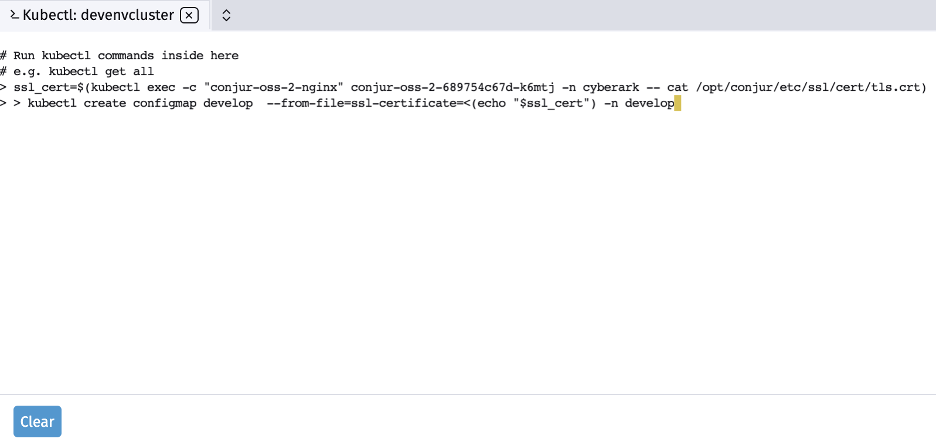
Next, we configure Secretless Broker with Conjur server certificates as Kubernetes configmap. We create the required configmap by executing the following commands in the Rancher Kubectl Shell. It’s important to remember to substitute the Conjur OSS pod name.
ssl_cert=$(kubectl exec -c "conjur-oss-2-nginx" conjur-oss-2-689754c67d-k6mtj -n cyberark -- cat /opt/conjur/etc/ssl/cert/tls.crt)

kubectl create configmap develop  --from-file=ssl-certificate=<(echo "$ssl_cert") -n develop
The secretless broker needs additional configuration to determine the keys to look up. We create the required configmap by executing the following commands in the Rancher Kubectl Shell:
wget -O secretless-config-YAML https://gist.github.com/rahul0208/7c51e1642ce57b11809f39b2e0917239#file-secretless-config-yaml
kubectl create configmap test-app-secretless-config --from-file=./secretless-config.yml -n develop
All we need to do now is deploy the application and its sidecar. First, we copy the required YAML configuration to the Cluster Deployment console and click the Deploy button. This action deploys the application with a LoadBalancer Kubernetes service.

Next, we open the Service Console to get the deployed service’s URL. Finally, we verify the application using the following cURL command:
curl -i http://a921ebfdc3e9b459c9c4d5bda042281a-1129319020.us-east-2.elb.amazonaws.com:8080/pets
HTTP/1.1 200
Content-Type: application/json;charset=UTF-8
Transfer-Encoding: chunked
Date: Tue, 27 Jul 2021 08:30:10 GMT
Next Steps
You now have hands-on experience with CyberArk Conjur, EKS, and Rancher. You deployed Conjur on a Kubernetes cluster and integrated it with a sample application running in Kubernetes using Secretless Broker.
Now that you know how straightforward it is to use Conjur to manage your Kubernetes secrets, you can set it up for your applications. Try Conjur for yourself to ensure your applications remain safe and secure.