
Knative is the de facto standard for running serverless workloads in Kubernetes. But what do you do when your Knative serverless functions need to access secrets like passwords and API keys?
You could use cloud services like AWS Secrets Manager or Azure Key Vault. But if you do, you’re stuck with vendor lock-in. Alternatively, you can use a more comprehensive solution like Conjur to manage secrets in Knative and all your other cloud services.
This tutorial shows how to retrieve and use Conjur secrets inside Knative-powered serverless functions. We’ll be working with a little bit of Java and JavaScript, and you can find the companion code on GitHub to follow along.
Creating a Knative Service
First, we use .NET 5.0 to create the Knative service. After installing the .NET 5.0 SDK, we create the new Web API project using the following command:
dotnet new webapi -o Conjur-Knative
This command prepares the Web API project. Then, we supplement the project with the new Web API controller, KnativeController (see Controllers/KnativeController.cs in the companion code files). The class implementing this controller uses the dependency injection to create the instance of the Options class (see Models/Options.cs):
private readonly Options options;

public KnativeController(Options options)
{
    this.options = options;
}
The controller exposes one GET endpoint, which will return a Secret value from the Options class instance:
[HttpGet]
public string Get()
{
    return options.Secret ?? "No secret was provided";
}
The Options class contains only one property (Secret) to represent the corresponding section of the application settings (appsettings.json). You can add as many properties as needed.
{
  "Logging": {
    "LogLevel": {
      "Default": "Information",
      "Microsoft": "Warning",
      "Microsoft.Hosting.Lifetime": "Information"
    }
  },
  "AllowedHosts": "*",
  "Options": {
    "Secret": "My-API-Key"
  }
}
We read the Options section of settings during application startup and then register the Options class instance as a singleton (see Startup.cs):
public void ConfigureServices(IServiceCollection services)
{
    services.AddControllers();
    services.AddSwaggerGen(c =>
    {
        c.SwaggerDoc("v1", new OpenApiInfo { Title = "Conjur_Knative", Version = "v1" });
    });
    // Get Options section and register the singleton
    var optionsSection = Configuration.GetSection("Options");
    services.AddSingleton<Options>(optionsSection.Get<Options>());
}
Additionally, the application configures custom URLs within the CreateHostBuilder method of the Program class (see Program.cs):
public static IHostBuilder CreateHostBuilder(string[] args) {
    string port = Environment.GetEnvironmentVariable("PORT") ?? "8080";
    string url = String.Concat("http://0.0.0.0:", port);

    return Host.CreateDefaultBuilder(args)
        .ConfigureWebHostDefaults(webBuilder =>
        {
            webBuilder.UseStartup<Startup>().UseUrls(url);
        });
}
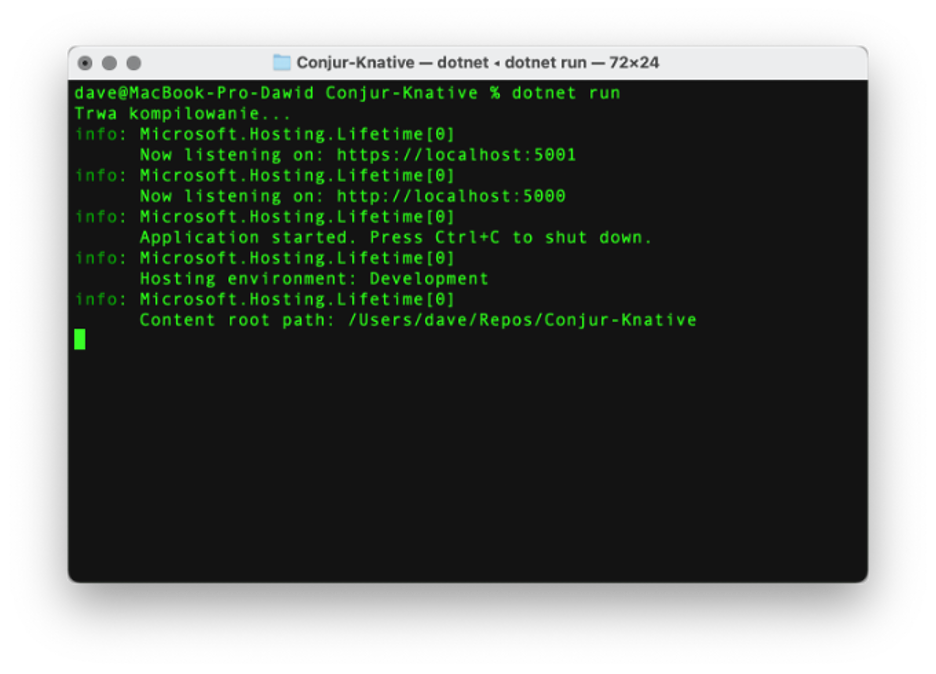
We can now build and run the app using the .NET CLI run command as follows. But ensure you’re under the project’s folder.
dotnet run
The output looks like this:
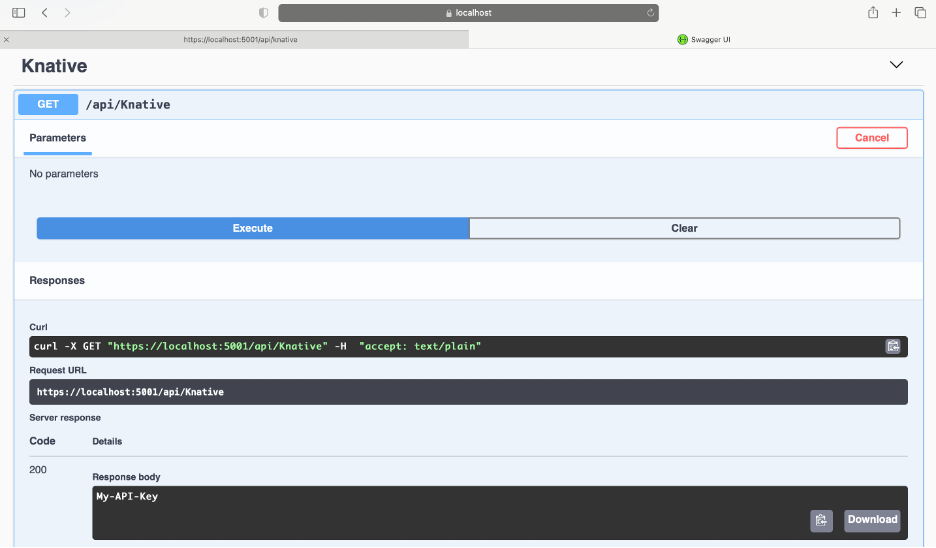
Then, we navigate to either localhost:5001/api/knative or localhost:5001/swagger. For the first case, we see the value of our secret:

For the second case, we get the Swagger user interface (UI), where we can invoke the Knative controller’s GET method:
Setting Up the Docker Container Image
Now that we have created our Knative service, we next deploy our service as a Knative serverless function. We need to containerize the application, so we start by adding the Dockerfile:
FROM mcr.microsoft.com/dotnet/aspnet:5.0-focal AS base
WORKDIR /app
EXPOSE 80
ENV PORT=8080

# Creates a non-root user with an explicit UID and adds permission to access the /app folder
# For more info, please refer to https://aka.ms/vscode-docker-dotnet-configure-containers
RUN adduser -u 5678 --disabled-password --gecos "" appuser && chown -R appuser /app
USER appuser

FROM mcr.microsoft.com/dotnet/sdk:5.0-focal AS build
WORKDIR /src
COPY ["Conjur-Knative.csproj", "./"]
RUN dotnet restore "Conjur-Knative.csproj"
COPY . .
WORKDIR "/src/."
RUN dotnet build "Conjur-Knative.csproj" -c Release -o /app/build
FROM build AS publish
RUN dotnet publish "Conjur-Knative.csproj" -c Release -o /app/publish

FROM base AS final
WORKDIR /app
COPY --from=publish /app/publish .
ENTRYPOINT ["dotnet", "Conjur-Knative.dll"]
The above Dockerfile uses a multi-stage build. It uses Microsoft’s .NET SDK Docker image to build the app (mcr.microsoft.com/dotnet/sdk:5.0-focal). Then, it uses the lighter ASP.NET runtime image from Microsoft (mcr.microsoft.com/dotnet/aspnet:5.0-focal) to launch the app. Note the Web API is exposed on port 80.
Let’s build and test the image before moving forward.
docker build -t conjur-knative:v1 .
After the build is complete, we can launch the resulting conjur-knative:v1 Docker image as follows:
docker run -d -p 0.0.0.0:80:80 -e "Options:Secret=Docker-API-Key" --name Knative conjur-knative:v1

docker run -d -p 80:80 -e "Options:Secret=Docker-API-Key" --name Knative conjur-knative:v1
The above command contains two essential parameters:
- Port mapping: -p 80:80, which maps the host port 80 to the same port in the Docker container
- Environment variable: -e “Options:Secret=Docker-API-Key,” which overrides application settings to change the secret value from My-API-Key to Docker-API-Key
Now, after navigating to localhost/api/knative, we see the following response:

Deploying the Service
Now that our Docker container image is in place, we are ready to deploy the containerized .NET Core Web API as the serverless solution to Knative Serving. First, we need to install Knative Serving in our Kubernetes cluster, as the Knative website explains.
kubectl apply -f https://github.com/knative/serving/releases/download/v0.24.0/serving-crds.yaml
kubectl apply -f https://github.com/knative/serving/releases/download/v0.24.0/serving-core.yaml

kubectl apply -f https://github.com/knative/net-kourier/releases/download/v0.24.0/kourier.yaml
kubectl patch configmap/config-network \
  --namespace knative-serving \
  --type merge \
  --patch '{"data":{"ingress.class":"kourier.ingress.networking.knative.dev"}}'

kubectl apply -f https://github.com/knative/serving/releases/download/v0.24.0/serving-default-domain.yaml
Then, we follow the official Knative guide to deploy Knative Service. Here, we use the YAML file to deploy the conjur-knative:v1 Docker image, which we prepared in the previous section.
Knative, however, requires us to use the appropriate tag to overcome Docker image digest analysis. So, we first tag the Docker image with the dev.local repository:
docker tag conjur-knative:v1 dev.local/conjur-knative:v1
Then, we use the following Kubernetes manifest file (k8s/conjur-knative.yml):
apiVersion: serving.knative.dev/v1
kind: Service
metadata:
  name: conjur-knative
  namespace: default
spec:
  template:
    spec:
      containers:
        - image: dev.local/conjur-knative:v1
          env:
            - name: Options__Secret
              value: "Knative-API-Key"
In the above file, we use the Knative Kubernetes resource and set the Secret value to Knative-API-Key (see the env setting under containers in k8s/conjur-knative.yml). Now we’re ready to deploy the app to Knative Serving:
kubectl apply -f k8s/conjur-knative.yml
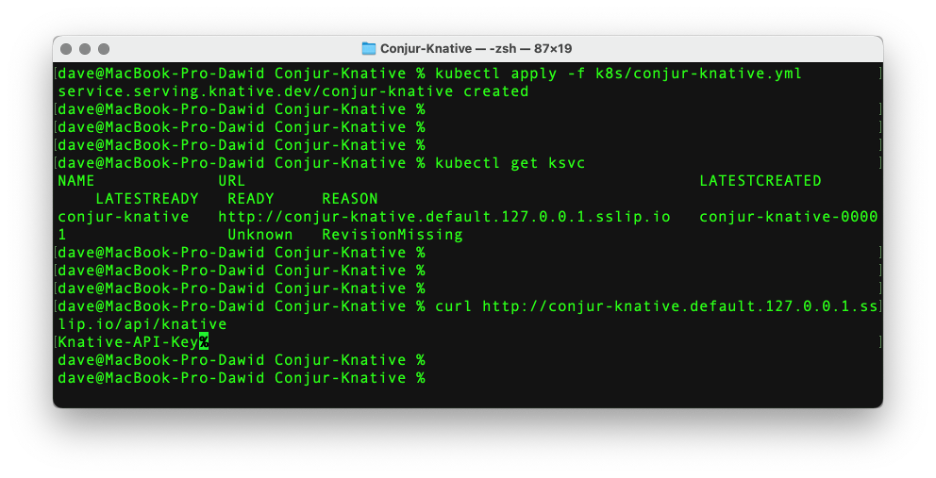
The output should say “service.serving.knative.dev/conjur-knative created.” We can read the endpoint URL by invoking the following:
kubectl get ksvc
Next, send the GET request under the resulting URL, supplemented by api/knative. In our case, the entire URL is http://conjur-knative.default.127.0.0.1.sslip.io/api/knative. The response should give us the Knative-API-Key.
The screenshot below summarizes all of the above commands:
Securing Secrets with Conjur
When the Knative function is ready, we can secure the secret with Conjur. We have a few options here. First, we could use the SDK and send the request to the Conjur server. This method, however, requires your application to store the API key.
Another option is to automatically retrieve secrets from Conjur and store them as Kubernetes secrets. The Knative function then reads the secret on launch.
CyberArk’s Secrets Provider for Kubernetes provides the Kubernetes job that connects to the Conjur server, reads the secrets, and writes them to the Kubernetes cluster. The advantage here is that your Kubernetes manifest files don’t contain secrets. Instead, they have a mapping between Conjur variables and Kubernetes secrets, like so:
stringData:
  conjur-map: |-
    optionsSecret: app/testapp/secret/optionsSecret
Here, we follow this route to secure our Knative function and read Options.Secret from the Conjur variable app/testapp/secret/optionsSecret.
In the first step, we create the test app namespace:
kubectl create ns testapp
Then, we instruct Knative to read Options.Secret from the Kubernetes secret knative-secrets, and modify the namespace to testapp:
apiVersion: serving.knative.dev/v1
kind: Service
metadata:
  name: conjur-knative
  namespace: testapp
spec:
  template:
    spec:
      containers:
      - name: secretless
        image: dev.local/conjur-knative:v1
        env:
          - name: Options__Secret
            valueFrom:
              secretKeyRef:
                name: knative-secrets
                key: optionsSecret
Subsequently, we follow steps 7 to 11 from CyberArk’s interactive tutorial. Note that we need to modify testapp-policy.yml to add another variable, optionsSecret:
body:
    - &variables
    - !variable secret/optionsSecret
As in the tutorial, we use the following:
- namespace: testapp
- service account: test-app-secure-sa
- authentication-container-name: secretless
Afterward, we set the variable value:
conjur variable values add app/testapp/secret/optionsSecret S25hdGl2ZS1Db25qdXItU2VjcmV0
Then we map Conjur variables to Kubernetes secrets through the following manifest file:
apiVersion: v1
kind: Secret
metadata:
  name: knative-secrets
type: Opaque
data:
  optionsSecret: S25hdGl2ZS1Db25qdXItU2VjcmV0
stringData:
  conjur-map: |-
    optionsSecret: app/testapp/secret/optionsSecret
Then, we bind the cluster role:
kind: RoleBinding
apiVersion: rbac.authorization.k8s.io/v1
metadata:
  name: conjur-authn-rolebinding
  namespace: testapp
subjects:
- kind: ServiceAccount
  name: authn-k8s-sa
  namespace: conjur-server
roleRef:
  kind: ClusterRole
  name: conjur-authn-role
  apiGroup: rbac.authorization.k8s.io
As explained in point 6 of this tutorial, we create the custom_values.yml file to use when installing the CyberArk Secrets Provider for Kubernetes. You can find the sample custom_values.yml file in the companion code (in the k8s folder).
We now Install the Secrets Provider for Kubernetes through Helm:
helm install secrets-provider cyberark/secrets-provider -f custom-values.yml --set-file environment.conjur.sslCertificate.value=conjur-default.pem -n testapp
We created conjur-default.pem earlier during the interactive tutorial.
We next redeploy the Knative function to see the secret:
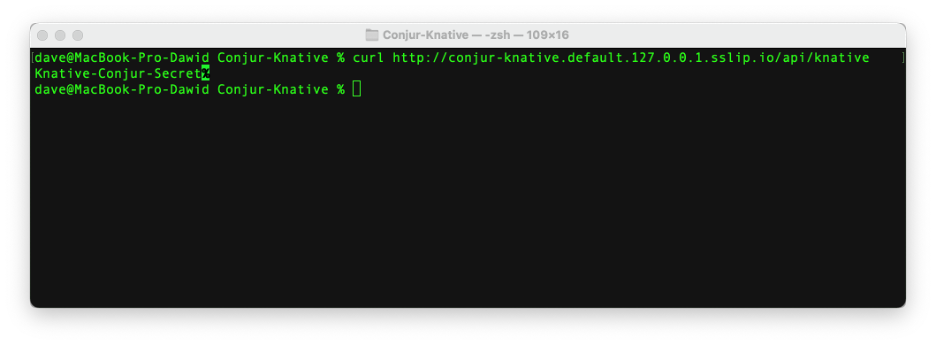
Our Knative serverless function now has secure access to the secret it needs.
Summary
In this article, we built a Knative function with .NET 5 and learned how to deploy it to a Kubernetes cluster. We then secured its secrets with Conjur and Secrets Provider for Kubernetes.
Using Conjur to manage your Knative serverless function’s secrets makes these credentials available to Kubernetes and all your other services while protecting them from harm. If you’re ready to learn more, visit the Conjur website to read more about Conjur, how it works, and where you can use it throughout your entire application and deployment stack.