
Cloud-native applications use resources available to them online, on a public cloud platform, or hosted on-premises. IT teams apply policies to ensure that the credentials of user accounts, as well as elevated accounts, are not exposed. If these credentials are exposed, then IT updates the credentials and wipes out data (such as from logs).
When it comes to the hosting environment, such as virtual machines and hosting processes, security measures are often lacking. One reason is hosting environments and virtual machines are considered disposable, rotated every time scaling takes place. Secondly, host machine security and protection is considered the platform vendor’s responsibility. Thirdly, IT teams often do not have enough training and software available. Finally, sometimes it is the organization’s policy to secure user identities only.
However, machine identities are as prone to hacks and unauthorized use as a normal user identity. Between 2018 and 2019, the number of reported machine identity-related cyberattacks grew by over 400 percent and the number of vulnerabilities involving machine identities grew by 125 percent. To fully protect the solution you provide and, in many cases, comply with international regulations, you must ensure your machine identities are protected, or at least governed. Minimize elevated access by your online resources.
In previous articles, we explored how to secure Amazon Web Services (AWS) resources, such as AWS Lambda, and grant access to secrets securely using CyberArk Conjur. In this article, we will explore how to configure Conjur for Azure.
Configuring Conjur for Azure
CyberArk Conjur secures your Azure Machines and their identities by providing elevated resources and credentials as needed, and only when they can authenticate their identities. Microsoft Azure provides managed identities that are the identity and access management (IAM) managers for your resources. In the next step, we will use the ID of the managed identity from Microsoft Azure to connect CyberArk Conjur with our Azure Function.
Note: We assume you have a CyberArk Conjur open-source editing tool installed, set up, and running for these steps. We have also followed these same steps while securing AWS resources using AWS IAM in a previous article.
We will use the Azure Authenticator in this article to deploy the policies needed to enable our Azure resource to read secrets from a secrets vault. If you want to follow a step-by-step guide to setup Azure Authenticator, visit this documentation site for CyberArk Conjur and DAP Azure Authenticator. We explain our workflow in the How it works section on that guide. This is an overview of what happens:
- Your application requests a JSON Web Token (JWT) from International Material Data System (IMDS) (it provides a token from Azure AD).
- You use this JWT token with a DAP server (APIs and SDKs available, see below) and receive an access token for your machine.
Note that this becomes the “machine identity,” and it is only authorized if the Azure platform validates your resource and it is registered with the CyberArk Conjur instance via a policy.
- Your machine can now request the secrets and sensitive information using this token.
The benefit is that only the machines validated to be “real” inside your cluster are provided with a secret. Secondly, this extra layer acts as a sort-of two-way authentication that secures your secrets from unauthorized access. We will showcase a few interesting policies in this article.
We configure the policies for Azure resources as we did for AWS, but with Azure, we need to define an Azure resource as a DAP host:
- !policy
  id: machine-identity
  body:
      - !group
      - &hosts
      - !host
      id: azureFunction
      annotations:
         authn-azure/subscription-id: <subscription-id-from-portal>
         authn-azure/resource-group: <your-resource-group>  # conjur-function-rg in screenshot below
      # authn-azure/user-assigned-identity: <identity-from-portal>
      # authn-azure/system-assigned-identity: <identity-from-portal>


      - !grant
      role: !group
      members: *hosts

- !grant
  role: !group /conjur/authn-azure/AzureWS1/apps
  member: !group azure-apps
Apply this policy to your Conjur instance (using the Conjur CLI). You can use the rest of the policies as they are.
$ conjur policy load root machine-identity.yml
Note: In this article, we used the user-assigned identity. You can use the system-assigned identity as well. However, for that, you need to read the object ID of this identity from Azure and run the policy again.
Next, we create a variable to store the secret, and our Azure Function will capture the value for this secret using the DAP’s RESTful API. Use the following policy to create a basic secret variable:
- !policy
  id: secrets
  body:
       - !group consumers

       - !variable hello

       - !permit
       role: !group consumers
       privilege: [ read, execute ]
       resource: !variable test-variable

- !grant
  role: !group secrets/consumers
  member: !group machine-identity
Now, deploy the variable:
$ conjur variable values add secrets/hello world
This should deploy a variable in the DAP database.
Protecting Azure Resources
CyberArk Conjur can use your managed identities in Microsoft Azure to secure your machines and their identities on the cloud. Out of the box, this means you can use CyberArk Conjur to provide sensitive data and secrets to your Azure Virtual Machines, Azure App Services, Azure Functions, and Azure Container Instances. We will look at provisioning the secrets for Azure Function instances.
Note: We assume you have created an Azure Function instance in your subscription and are ready to attach the managed identities that will access the secrets from Conjur.
First, we need to set up the managed identity for an Azure Functions instance. You can specify this inside Azure Portal, under Settings:
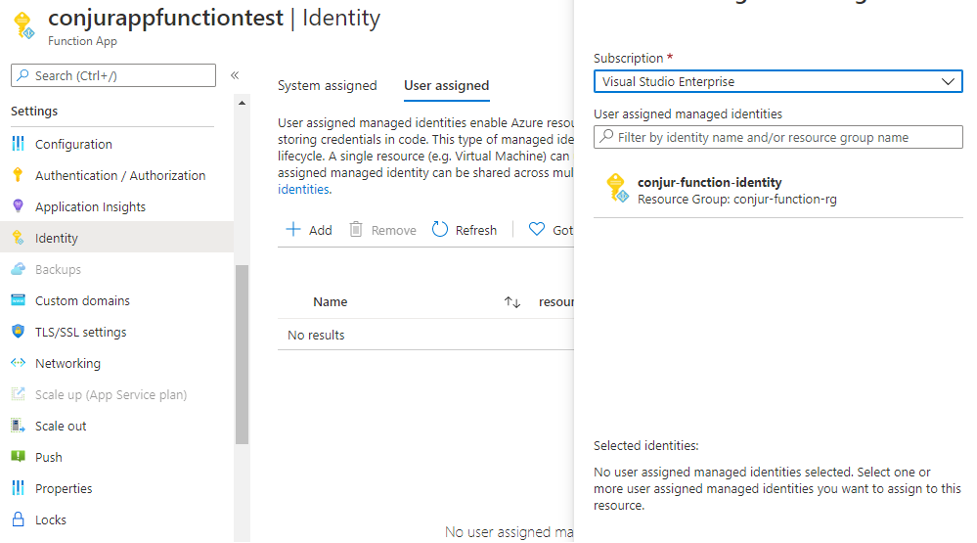
Just select the identity from here. If you cannot see one, create one in Azure Portal first. We can assign Azure roles to this identity and we can also use this identity directly with a Conjur instance. In the step above, we use the ID of this managed identity connected with the Function instance. This will grant Azure managed identity access to read secrets and values from the CyberArk Conjur/Dynamic Access Provider (DAP).
To retrieve the security token from Azure IMDS, we can either use the bare HTTP RESTful API or a language SDK to help us query for a JWT token for our resource. The endpoint can only be called from within the Azure network, and if it is validated, you receive the JWT access token.
Once you have this token, you can use the Conjur SDK to get an access token for your Conjur/DAP server. You will need this token to request the secret we have stored in the “hello” field. Use this .NET sample code to read the values from your secrets vault.
Next Steps
In this article, we discussed how to use CyberArk Conjur to secure and safeguard Azure resources, especially Azure Functions and Azure App Services, to prevent unauthorized access. In our previous posts, we demonstrated using AWS as a cloud for CyberArk Conjur integrations, and this post shows that using CyberArk Conjur on Microsoft Azure is also easy. Using Conjur makes it easier for your organization to maintain a hybrid cloud environment or connect your on-premises cloud environment and resources securely with these online public cloud vendors.
Using the Azure Authenticator with CyberArk Conjur, we provide secrets safely to Azure resources (such as Azure App Service, Azure Functions, and more) so they can perform their duties. Your IT and Ops teams no longer need to monitor and manage each resource independently.
To delve deeper, visit this GitHub thread for Azure Authenticator. Also visit the CyberArk Conjur website to learn more ways you can secure your machine identities on various cloud platforms. and bolster your cybersecurity.

John Walsh has served the realm as a lord security developer, product manager and open source community manager for more than 15 years, working on cybersecurity products such as Conjur, LDAP, Firewall, JAVA Cyptography, SSH, and PrivX. He has a wife, two kids, and a small patch of land in the greater Boston area, which makes him ineligible to take the black and join the Knight’s Watch, but he’s still an experienced cybersecurity professional and developer.